This is for Cougar owners to do and Tbird owners to admire 
Background
Starting with the 1994 MY, the Cougar received an all new set of taillights that lasted to the final 1997s. The panel abandoned the early 90s Mercury trademark black/red pattern "laser stripe" pattern established by the 1986 Sable in favor of an all new panel with a more stylized monochromatic scheme (although still retaining subtle laser stripes). With the addition of the Bright spear trim/emblems below, the overall look was a pretty dramatic looking departure from 1993 and gave the Cougar more obvious full width taillight assembly than it previously appeared to have prior.
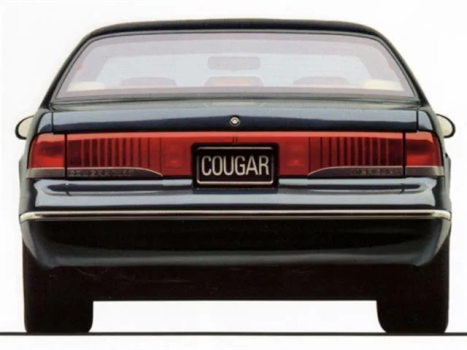
One aspect often overlooked by most is that the panel was intended to have its reverse lights blended in. For reasons not quite clear, the actual production application of this detail seems to be either a quality control hit and miss. Some taillights had them, others not. Some Cougars even seemed to have rolled off the showroom with one red and the one white! The factory paint does seem prone to fading off too however, so that may be the actual culprit too(my memory of how Cougar's looked brand new in 1994-1997 is fuzzy at best), either way you don't want to be like this poor guy who will remain anonymous!
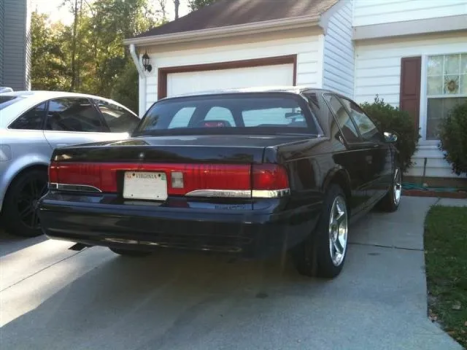
In any case, the lack of this detail takes a surprising amount of the intended look out of the taillight assembly and the car itself. If you're like me(picky, anal, finicky, insane), knowing your boring clear reverse light lenses could be more than what they are might drive you to great lengths to compensate. You might even end up building up an engine jam packed with thousands of dollars worth of thermal and antifriction coatings just to take your mind off of it!
Solution
Repaint them. There are several red paints available from hardware stores, hobby stores and autoparts to choose from. The factory used(or was supposed to use) a fairly generic semi-gloss red so you don't have to be too picky about shade to get the factory look. Generic Krylon banner red is very close to the factory color and looks best on 94/5 non-metallic reflectors, while some sort of metallic candyapple red might work better on the silverbacked 96/7 lenses. The hard part as you might expect would be masking, and indeed if you were doing this with tape you'd have a very frustrating experience. That's where petroleum jelly comes in(no butt jokes). When applied it will prevent anything from sticking to the surface it's over and with the right preparation, it makes an instant masking tool.
Supplies needed:
• Petroleum jelly
• Masking tape and paper (I used garbage bags)
• Paper towel
• Adhesion promoter(I used duplicolor)
• Duplicolor BGM0388 Bright Red Acrylic Lacquer
• Duplicolor Enamel clearcoat
• Toothbrush
1. Remove the reflector assembly from your car. Start by twisting off the two reverse light holders and proceed to removing the several 10mm nuts. The assembly will lift right off the trunklid without any resistance. If it doesn't lift right off easily double check that you removed all the nuts, the assembly will crack if you're not careful!!!
2. Lay the reflector assembly down on a clean workbench and begin masking off the reverse light lenses. There's a small gap around the perimeter of them where you can slip the tape into, use smaller pieces of tape to fill the corners.
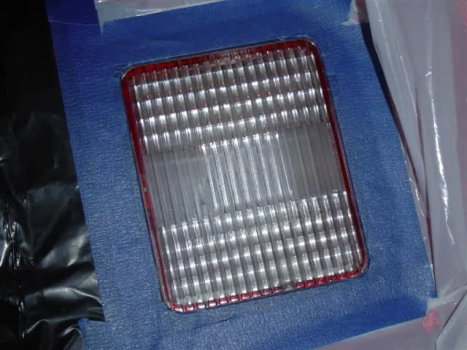
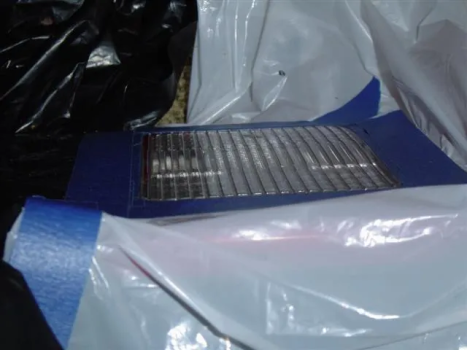
3. Wrap the reflector assembly in masking paper
4. Take a dab of Vaseline and run it up and down the channels of the lens with your finger. Use light amounts though and take your time, you just need enough to fill the channels with the light refractors. Excessive amounts will only make cleaning the top ridges more time consuming.
5. fold up a single sheet of paper towel into a 3" or so square and lightly wipe off the excess petroleum jelly on the top ridges. Do this a few times until the excess has been removed (run your finger over it to see if it's slippery) and move on to wiping it the same way but with a fresh damp sheet(use warm or hot water). You can wipe it with alcohol sheets as well, anything to get the Petroleum jelly off the top ridges.
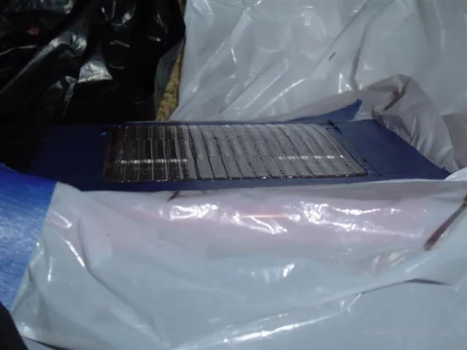
6. Place the masked/jellied assembly into a well ventilated area and apply a coat of adhesion promoter to the lens. After a few minutes follow that up by a light coat of the red, followed by a 2-3 heavier coats every 10 minutes. Let it dry a few hours before applying the clear, then repeat the same process.
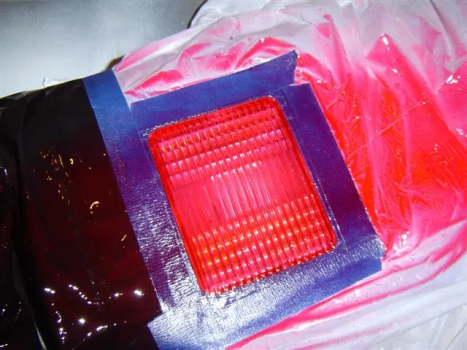
7. After about a few hours of drying you should be ready to unmask. Before doing so though, start by pouring some warm water over the lens and wipe the jellied inner ridges vertically with a toothbrush. The brush will quickly remove the paint from the vaselined areas leaving the top ridges red.

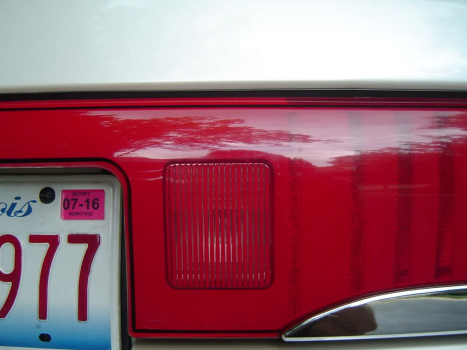
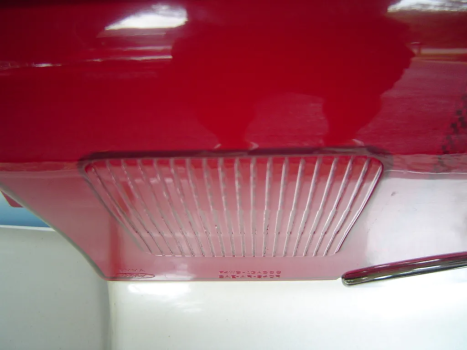
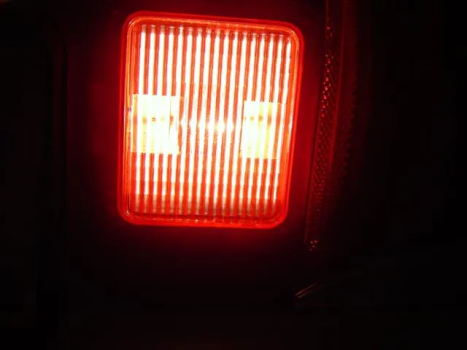
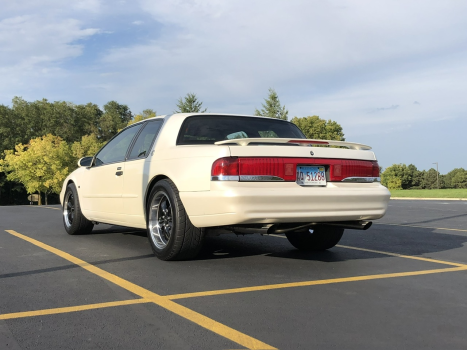
Good as new, as the Ford god intended
Background
Starting with the 1994 MY, the Cougar received an all new set of taillights that lasted to the final 1997s. The panel abandoned the early 90s Mercury trademark black/red pattern "laser stripe" pattern established by the 1986 Sable in favor of an all new panel with a more stylized monochromatic scheme (although still retaining subtle laser stripes). With the addition of the Bright spear trim/emblems below, the overall look was a pretty dramatic looking departure from 1993 and gave the Cougar more obvious full width taillight assembly than it previously appeared to have prior.

One aspect often overlooked by most is that the panel was intended to have its reverse lights blended in. For reasons not quite clear, the actual production application of this detail seems to be either a quality control hit and miss. Some taillights had them, others not. Some Cougars even seemed to have rolled off the showroom with one red and the one white! The factory paint does seem prone to fading off too however, so that may be the actual culprit too(my memory of how Cougar's looked brand new in 1994-1997 is fuzzy at best), either way you don't want to be like this poor guy who will remain anonymous!

In any case, the lack of this detail takes a surprising amount of the intended look out of the taillight assembly and the car itself. If you're like me(picky, anal, finicky, insane), knowing your boring clear reverse light lenses could be more than what they are might drive you to great lengths to compensate. You might even end up building up an engine jam packed with thousands of dollars worth of thermal and antifriction coatings just to take your mind off of it!
Solution
Repaint them. There are several red paints available from hardware stores, hobby stores and autoparts to choose from. The factory used(or was supposed to use) a fairly generic semi-gloss red so you don't have to be too picky about shade to get the factory look. Generic Krylon banner red is very close to the factory color and looks best on 94/5 non-metallic reflectors, while some sort of metallic candyapple red might work better on the silverbacked 96/7 lenses. The hard part as you might expect would be masking, and indeed if you were doing this with tape you'd have a very frustrating experience. That's where petroleum jelly comes in(no butt jokes). When applied it will prevent anything from sticking to the surface it's over and with the right preparation, it makes an instant masking tool.
Supplies needed:
• Petroleum jelly
• Masking tape and paper (I used garbage bags)
• Paper towel
• Adhesion promoter(I used duplicolor)
• Duplicolor BGM0388 Bright Red Acrylic Lacquer
• Duplicolor Enamel clearcoat
• Toothbrush
1. Remove the reflector assembly from your car. Start by twisting off the two reverse light holders and proceed to removing the several 10mm nuts. The assembly will lift right off the trunklid without any resistance. If it doesn't lift right off easily double check that you removed all the nuts, the assembly will crack if you're not careful!!!
2. Lay the reflector assembly down on a clean workbench and begin masking off the reverse light lenses. There's a small gap around the perimeter of them where you can slip the tape into, use smaller pieces of tape to fill the corners.


3. Wrap the reflector assembly in masking paper
4. Take a dab of Vaseline and run it up and down the channels of the lens with your finger. Use light amounts though and take your time, you just need enough to fill the channels with the light refractors. Excessive amounts will only make cleaning the top ridges more time consuming.
5. fold up a single sheet of paper towel into a 3" or so square and lightly wipe off the excess petroleum jelly on the top ridges. Do this a few times until the excess has been removed (run your finger over it to see if it's slippery) and move on to wiping it the same way but with a fresh damp sheet(use warm or hot water). You can wipe it with alcohol sheets as well, anything to get the Petroleum jelly off the top ridges.

6. Place the masked/jellied assembly into a well ventilated area and apply a coat of adhesion promoter to the lens. After a few minutes follow that up by a light coat of the red, followed by a 2-3 heavier coats every 10 minutes. Let it dry a few hours before applying the clear, then repeat the same process.

7. After about a few hours of drying you should be ready to unmask. Before doing so though, start by pouring some warm water over the lens and wipe the jellied inner ridges vertically with a toothbrush. The brush will quickly remove the paint from the vaselined areas leaving the top ridges red.


Good as new, as the Ford god intended

Last edited:
