1997ThunderbirdLXV6
Seasoned PostWhore
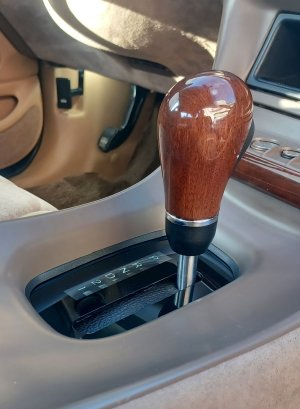
The Lincoln LS came with either a leather-wrapped or a genuine wood shift knob. This how-to specifically applies to the wood version. The internals of the leather knob are the same; however, it is more difficult to take apart because the leather is glued all around whereas the wood version is open to the front (if anything I think you'd have to re-wrap it).
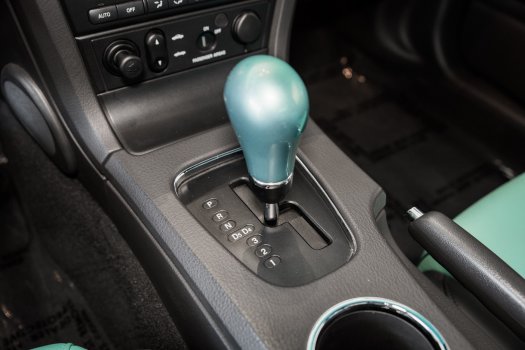
The same knob is used in the retro Thunderbird, however oftentimes painted in bright colors like red or turquoise green as well as gloss black.
Here are some examples.
LS:
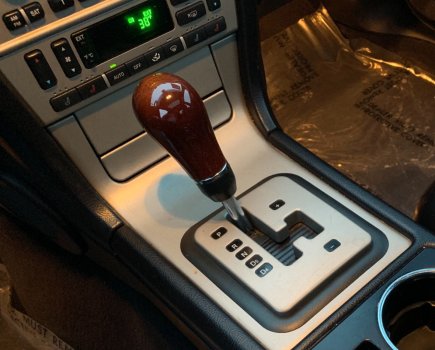
Retro Thunderbird:
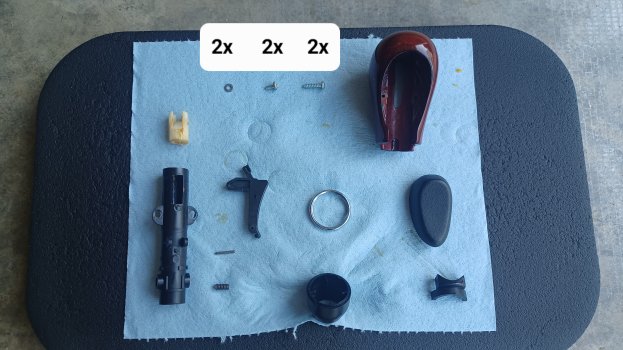
Shift Knob Parts
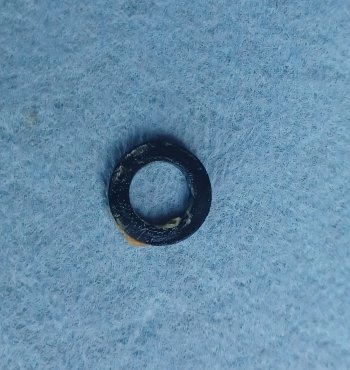
I forgot to include this rubber washer in the picture. It sits in the body below the white slider; however, we won't need it:
The Challenge
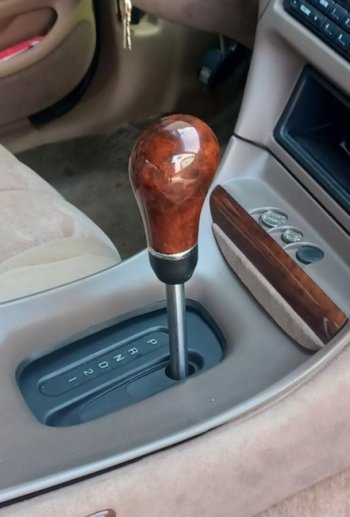
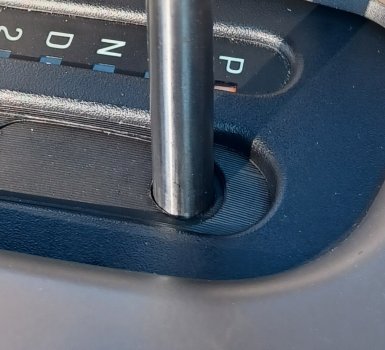
...is to make the knob sit low enough for visual appeal. Our shifters are very tall.
Without modification, this is what you get:
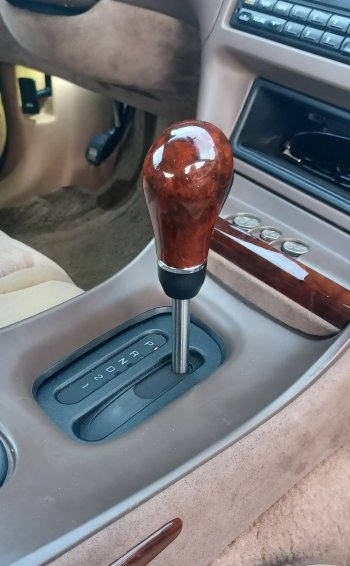
With modification, you gain about an inch downward, which I believe substantially improves the look:
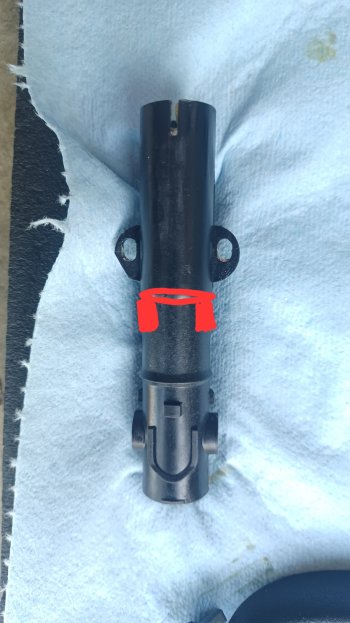
What prevents the knob to go lower are a ring and two notches inside the inner body, located approximately here:
The Modification
This is a good opportunity to remind everyone that I'm not a professional. This is just a summary of what I did in my car. I don't make any recommendations, so use this information at your own risk.
Disassemble the shift knob. There may be some glue holding the inner body to the shell; just pull apart.
A.
Remove the slider and rubber washer. Drill out the inside from above using a half inch drill, thereby removing the inner ring and notches.
Now the body can slide down further on the metal shift rod.
B.
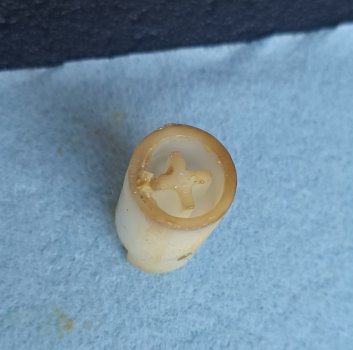
Modify the slider itself. Using a dremel, file down just the inner (cross-shaped) portion while keeping the outer shell intact:
C.
Now the tricky part: you have to drill into the metal shift rod to secure the knob. Two holes technically, though I only drilled one hole and used only one screw/washer. That's enough to be solid in my opinion.
Important: remove the inner plastic rod before drilling!
Before drilling, you have to determine the correct height. That requires some trial and error, but here is a hint:
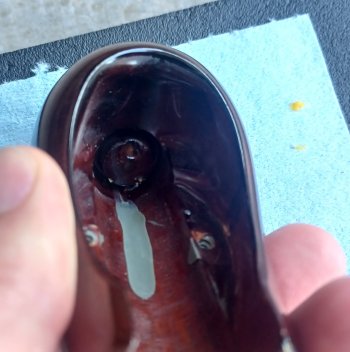
You see here that the wood slides into the inner body at the top by maybe a little less than a quarter of an inch. That means that the slider, in its highest position, must not interfere with the wood shell, about so:
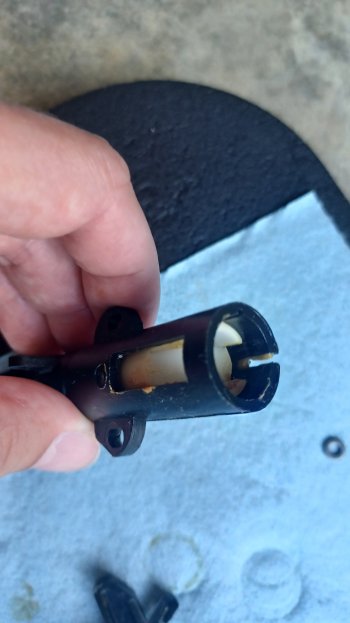
You can also tell by the lever: if the slider comes too high, the lever can't catch it.
Once ready to screw in, first place the plastic rod back into the metal rod. Then don't forget the tiny washer(s) which prevent the screws from hitting the plastic rod inside the metal rod.
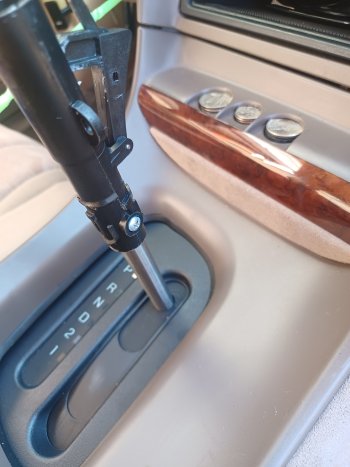
Apologies for the above picture: it's missing the shroud and trim ring. Those have to go on first of course. Reassemble the shift knob pieces.
What also needed to be done...
...but I only just thought about it.
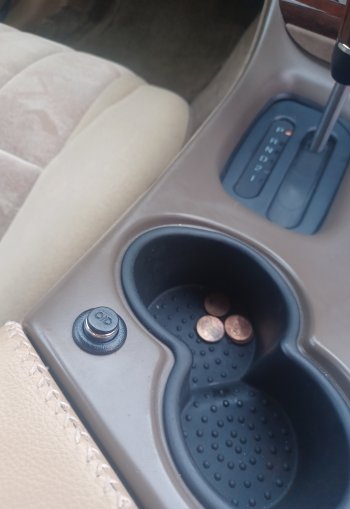
Relocate the O/D button and replace the sliding trim inside piece with one with a half inch opening.
I won't go into much detail here. Suffice to say that the sliding trim from the LS provided enough material to cut out that needed trim piece.
The same knob is used in the retro Thunderbird, however oftentimes painted in bright colors like red or turquoise green as well as gloss black.
Here are some examples.
LS:

Retro Thunderbird:

Shift Knob Parts

- Carved wood shell
- 2x long screw to attach internal body to shell
- 2x short screw and washer to attach knob to metal shift rod
- Internal body
- Internal up/down slider (white)
- Lever with spring and pin (black)
- Shroud with trim ring
- Lever cover
- Lower front cover (below lever cover)
I forgot to include this rubber washer in the picture. It sits in the body below the white slider; however, we won't need it:

The Challenge
...is to make the knob sit low enough for visual appeal. Our shifters are very tall.
Without modification, this is what you get:

With modification, you gain about an inch downward, which I believe substantially improves the look:

What prevents the knob to go lower are a ring and two notches inside the inner body, located approximately here:

The Modification
This is a good opportunity to remind everyone that I'm not a professional. This is just a summary of what I did in my car. I don't make any recommendations, so use this information at your own risk.
Disassemble the shift knob. There may be some glue holding the inner body to the shell; just pull apart.
A.
Remove the slider and rubber washer. Drill out the inside from above using a half inch drill, thereby removing the inner ring and notches.
Now the body can slide down further on the metal shift rod.
B.
Modify the slider itself. Using a dremel, file down just the inner (cross-shaped) portion while keeping the outer shell intact:

C.
Now the tricky part: you have to drill into the metal shift rod to secure the knob. Two holes technically, though I only drilled one hole and used only one screw/washer. That's enough to be solid in my opinion.
Important: remove the inner plastic rod before drilling!
Before drilling, you have to determine the correct height. That requires some trial and error, but here is a hint:

You see here that the wood slides into the inner body at the top by maybe a little less than a quarter of an inch. That means that the slider, in its highest position, must not interfere with the wood shell, about so:

You can also tell by the lever: if the slider comes too high, the lever can't catch it.
Once ready to screw in, first place the plastic rod back into the metal rod. Then don't forget the tiny washer(s) which prevent the screws from hitting the plastic rod inside the metal rod.

Apologies for the above picture: it's missing the shroud and trim ring. Those have to go on first of course. Reassemble the shift knob pieces.
What also needed to be done...
...but I only just thought about it.
Relocate the O/D button and replace the sliding trim inside piece with one with a half inch opening.
I won't go into much detail here. Suffice to say that the sliding trim from the LS provided enough material to cut out that needed trim piece.


Last edited:

