Looking for Car Audio Suggestions - Best of 2020

Trunk Monkey

Administrator
Staff member
Joined
Sep 12, 2023
Messages
1,507
Location
Charlotte, NC
Vehicle Details
'95 Thunderbird with '18 TF 5.3L - SVO Engine
Country flag
Originally Posted: May 24, 2020

I'm going to tackle upgrading the stereo in the car finally. If you guys were to upgrade your stereo what would be your choice for a head unit in 2020?

Would you go single DIN with a pop-out screen? Single DIN with a standard display? Or fab up a Double DIN configuration? I've also considered installing an iPad mini but I don't have the fab skills to modify the dash. There's also the floating display ALPINE HALO in either 9" or 11" display. I was looking at these but the resolution on the display is atrocious and I think the 11" might be just too big for a Tbird interior. Thoughts?

Do you have MFG preferences? Alpine, Sony, Pioneer or some other brand?

I have three AMPS from a previous install sitting in the garage (2 SONY and one PIONEER). The Sony's are rated at 120w x 2 each for a total of 480w. I plan on driving the door and back seat speakers with these. I also have a PIONEER that's rated at 180w x 2 for a sub-woofer. I was thinking of going with a sealed box and two 10" speakers in a box on the trunk shelf. With a back seat delete firing the sub-woofer speakers directly into the passenger compartment. My total wattage is going to be a modest but respectable 840 watts of power.
 
Thanks Matt. I've had one or two Pioneer receivers over the years. My currently installed receiver is a SONY CDX-C7850 that I bought in 1999.

Now I'm looking at the Pioneer DEH-80PRS which is comparable to the DEH-X8800BHS. What I like about this one is that it has an auto Time Alignment feature. It was released in 2012 but is still available.

Pioneer DEH-80PRS CD receiver at Crutchfield

 
Originally posted May 30, 2020

Thanks Matt. You misunderstood me. I was talking about just switching the radio and the climate control within their existing DIN slots. Not moving the climate control all the way to the bottom. I like the bottom cubby where it is as well and I'm not about to mess up the radio bezel.

After reading up on it I was wondering if my EVO is even still working. As I remember when the car was new the EVO was very noticeable but now, not so much. I have to wonder if the variable assist system is even working at all after all these years and all the work I've had done to the car. Is there any way to check? Is it one of those systems that never really fails or will fail in a default position?

I found this article after a brief search that provides some info on the system.


https://my.cardone.com/techdocs/PT 20-0024.pdf
 
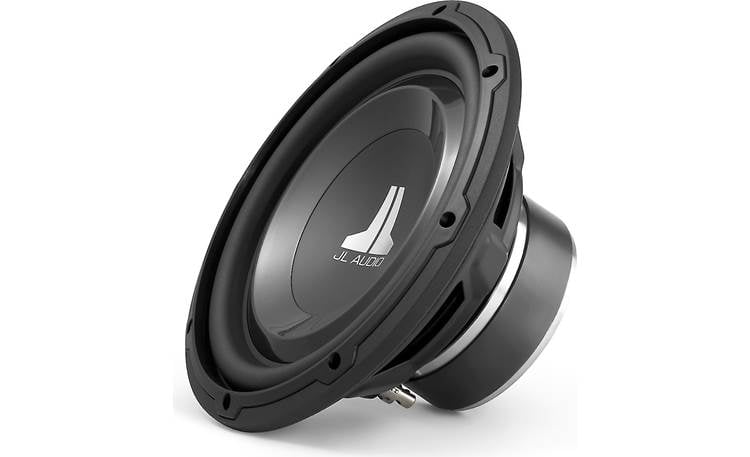
Settled on the sealed box design. I'm going to go with two JL Audio 10W1v3-4's.

For the sub amp the JL Audio JD500/1 with subs wired in parallel to present a 2 ohm load to the amplifier. Subs firing to the rear.

www.crutchfield.com

JL Audio 10W1v3-4

W1v3 Series 10" 4-ohm subwoofer
www.crutchfield.com
www.crutchfield.com

www.crutchfield.com

JL Audio JD500/1

JD Series mono subwoofer amplifier — 500 watts RMS x 1 at 2 ohms
www.crutchfield.com
www.crutchfield.com
 
Back on topic. I was looking at this and realized that it's a mono-bass set up. (I know, I'm not paying attention!). Is this common for sub boxes ... to set up a mono configuration vs. stereo?

I was looking at this video and never realized that bass is essentially mono and stereo bass can cause problems. You guys have any experience with or thoughts on this? I'm completely new to the subwoofer scene and am learning on the fly. Thanks.


The subs and amp are sitting in the garage. Still waiting on the custom subwoofer box blueprint. No rush though I've got plenty to do in the meantime.

I'm SLOWLY making my way around the vehicle sound treating everything. I got the new power cord run and buttoned up the drivers side fender well. I made a new penetration in the sheet metal just below the E-brake cable. It's a damn good thing I pulled the airbag sensor out of that location before drilling because for sure I'd have pierced it with the drill bit! I've also run the new speaker wire through the driver's side door boot. So that side's done.

38529


38530
 
Really good stuff. But like all sound treatment materials crazy expensive! 🤑🤑🤑 I didn't do a direct price comparison but I'm pretty sure it costs less than Dynamat. Unlike Dynamat you can buy it direct from SoundSkins without having to go through a mark-up middle-man ... I mean a dealer, like Dynamat.

I got the Pro Plus Workshop Kit version. It costs more than the four roll Mega kit but the price per square foot is less overall.

There's also a light version. SoundSkins | SoundSkins Global | #ThinkBiggerThinkBetter

It ships out of California and took a week to arrive.


soundskinsglobal.com

Products

SoundSkins was founded in 2015 with our first product SoundSkins Pro in Australia. SoundSkins Global has grown to be recognized as a world leader in sound deadening products. The SoundSkins brand is preferred by #1 retailers across the globe and continues to release exceptional products backed...
soundskinsglobal.com
 
Originally posted: June 7, 2020

Today:

  • Got the Amp power wire routed to the trunk.
  • Replaced the left front splash guard and tire (Reassembly from running the power wire)
  • Routed the drivers side door speaker wire to the trunk
  • Sound treated the passenger's side door and reassembled
  • Ran new speaker wire through the door boot and back to the trunk from the passenger's side door
  • Sound treated the inside sheet metal under the rear seat side windows. - Exterior sheet metal in this location treated yesterday.
  • Started sound treating the rear deck - from the bottom. Over head work sucks!
 
June 8, 2020: Couple more pictures.

38546


38547
 
Finished treating the underside of the rear deck today. Did I mention over head work sucks?

Once I got that done I dropped the headliner and discovered what a half-ass mess Ford had done with the roof liner. No wonder it sounded like a drum when I tapped on the roof.

I pulled the factory crap out and put some quality sound treatment up. I didn't need to take the headliner all the way out of the car. I just laid the seats back and put some cardboard on the seats for the headliner to rest on and worked around it. Did I mention overhead work sucks?

38548


38549


38550


38551


38553
 
June 9, 2020

Thanks guys! Well, Joe, you know how to take it apart, now all you've got to do is buy the material.


Mine looked like that too when I dropped the headliner to run the wires for the electronic mirror a few years back. That cork stuff just doesn't stick.

Do you notice a major difference in the tone/volume/reverb when you tap the roof with the new matting installed?
Huge difference Brandon. The roof is solid. Absolutely no more reverb when the roof is tapped. I won't be able to really comment on the interior sound difference until I take it for a drive. I really wish that I had the means to take before and after sound measurements. One test that I saw on YT the guy measured a 3 dB drop in sound which is a 50% reduction! If you know anything about sound, the sound pressure level doubles every 6 dB. PERCEIVED (psycho acoustic) sound level doubles every 10 dB. So, in his case it was 33% reduction in perceived sound. I'd be very happy with that. I'd imagine that I've gotten an even better reduction in noise than he did in his car.

If any of you are interested I found a good explanation of the differences in sound levels here.

I can't wait to put the car back together and take it for a drive. Shutting the doors now have a definitive THUD. The whole car sounds much more solid. I've yet to put any sound treatment on the trunk lid, although I know it needs some too. I don't want to mess up the nice paint job that Chung did! I'll see if I can tuck some sound treatment away between the sheet metal layers.

Provided I'm happy with the RCA cables that I have (I'm scrounging up what RCA cables I have laying around the garage from previous stereo builds plus one that was included in the amp install kit that I ordered), today I'm going to install the radio. I won't be getting any sound out of it though, as I still have to wire the amps and speakers.
 
June 9, 2020


Thanks so much Greg. It's already reinstalled. The headliner is in remarkable shape for it's age. I've been very fortunate with it. When it does eventually fail I'll be sure to get it recovered. I now know how to remove it.

Today I spent routing all the RCA cables, soldering the wiring harness, trimming the console mounting bracket to fit all the RCA cables, installing the radio and reassembling the dash. It doesn't sound like much but wow did all that work eat up the time! Alas, I lost a 7mm socket to the Dash gods tonight. I caught it on the edge of the dash trim while reinstalling the instrument cluster and it dropped into the dash never to be found. Believe me, I looked!

The stereo glows and looks pretty but it's not making a sound yet as I still have to install all the amps and make all the speaker connections. One thing at a time.

Today - From This:

38563


38565


To this: I haven't run set up yet but after thirty seconds of showing this it switches over to demo mode and wow is that display beautiful! The colors are amazing. I can't wait to hear how it sounds.

38566
 
June 9, 2020

Thanks Brandon! So true! It's a LOT of work!

No, my pristine instrument cluster surround got a small crack at the base just above the steering column. I tried patching it with Bondic LED UV plastic weld but it didn't hold. Fortunately it's small and barely noticeable. I cringe every time I have to remove that piece. Everything else is durable and, for the most part, replaceable. But I know how those instrument cluster surrounds in good shape are Unobtainium.
 
June 10, 2020

Great Idea about printing these. Didn't know that was possible. Would need a really big printer to do it!

Today?! Wow, what a day!
  • Wired the rear speakers
  • Cut the rear deck trim for a speaker grill on the drivers side (Opposite of the factory perforation) - more on that later
  • Lightly sound treated the trunk lid
  • Reinstalled the rear deck trim and 3rd brake light
  • Reinstalled the right and left rear sail panels including: seat-belts, and speakers
  • Reinstalled the SC L-Braces and the LX V-Brace (Yes, I'm using both in my car)
  • Reinstalled the Trunk Carpet
  • Found a grounding point and put the wire together to run from the grounding point to the splitter (I'm running 4GA to a splitter and 8GA wire off of that to the amps - Same for the power)
  • Cleaned the dust off of my old amps that have been sitting on a shelf in the garage for the past 25 or so years. I haven't had these amps in a car since before I bought the Tbird! All the way back in 1994!
Took the car for a drive tonight (my boy insisted) Wow, what a difference! I never realized how noisy the car was until I dampened all the extraneous sounds. Didn't play the radio yet, I still haven't connected the amps. Just took a quick loop around the area to check things out.


Ok, on the nitty gritty details. Joe asked for some additional pictures of the sound treatments.

Here's the underside of the rear deck. I used scraps here and pieced the jigsaw puzzle together because it's an area that won't be seen.

38581


38582


38583


Passenger's side wheel well and Gas intake tube. I didn't quite finish this corner because I was conserving materials for the roof.

38584


R.I.P. Ralph Phillips 1956 - 2021
 
The Driver's side rear quarter panel. i used two sheets here and covered from the upper to the lower detail line (that little ridge in the sheet metal) I believe it was 16" between the two lines. I also sound treated the back side of the inteior unibody sheet metal.

38585


Two strips up the inside of the C pillar (both sides). I was able to work it in between the holes and then adhere it to the exterior sheet metal.

38586


Passenger's side rear quarter

38587


R.I.P. Ralph Phillips 1956 - 2021
 
This is inside the rear quarters Sound treatment on the OD, Sound treatment on the backside of the ID and I ran a 4" wide strip over the top of the rear wheel wells in this location. (Both sides). I did it in three pieces to make application easier. I don't remember the exact lengths I want to say 12" to 14" long x 2 pieces and at the very top like 5" or 6" long.

38588


38590
 
June 10, 2020

Centered up the logo and put it in the corners of the trunk lid.
38591
 
Now, here's what I did with the rear deck. I was looking for a speaker grill to open up the drivers side port. There's a factory port to the trunk that's perferated on the passenger's side that we've discussed previously, but there's also a hole in the rear deck in about the same place on the drivers side that I want to open up. Since I wanted a grill that both matched the interior color and Ford speaker grill style, I bought an extra set of rear speaker grill covers and used one of those to do the job. I'm no upholsterer but I can watch YT videos all day long! LOL

Here's what I did. It turned out great and I'm really happy with the look. It sits flush with the rear deck carpet and looks factory.

The black sharpie is the outline of the sheet metal hole, the silver sharpie is the outline of the speaker grill.

38592


I extracted the grill from the rear speaker cover.

38593


And proceeded to counter sink it into the rear deck cover.

38594


38595
 
I was very, very happy with the end result.

38596


38597


R.I.P. Ralph Phillips 1956 - 2021
 
I bought the Soundskins PRO Plus roll, it's about 65 sq ft. It was just barely enough, I have a 2' by 3' piece and some scraps left. That's it.


soundskinsglobal.com

SoundSkins Pro Plus | by SoundSkins Global

SoundSkins Pro Plus is an extra large workshop roll of our popular SoundSkins Pro 3 in 1 sound dampening material. Designed to improve your cars stereo performance and reduce outside road noise in a single material. SoundSkins Pro Plus is a combination of 3 layers, acoustic foam, foil & rubber...
soundskinsglobal.com
 
June 19, 2020

Just a quick update on the project. Finished the box yesterday, just waiting on binding posts and carpet to wrap it with. Meanwhile, I'm learning my way around the new receivers' functions and ... realizing how bad my old Pioneer speakers are in the back seat and doors. I'll be looking to upgrade them some time in the future.

38719

38720
 
Solved part of the problem with the old speakers. The old speakers (6" x 8" 3-way, Pioneer TS-A6815) are only rated down to 30 Hz and they were choking on boosted bass. I've never run these speakers before with an amplifier or a capable receiver.

Anyway, I figured out how to set the high-pass filter on the new receiver and now they sound so much better! I set the filter at 50 Hz with a 6 db slope.
 
Solved part of the problem with the old speakers. The old speakers (6" x 8" 3-way, Pioneer TS-A6815) are only rated down to 30 Hz and they were choking on boosted bass. I've never run these speakers before with an amplifier or a capable receiver.

Anyway, I figured out how to set the high-pass filter on the new receiver and now they sound so much better! I set the filter at 50 Hz with a 6 dB slope.
Bumped the slope another 6dB to 12dB. That smoothed things out a little more.

I went ahead and ordered a pair of the JL JD400/4's to replace my old SONYs; they'll be here Wednesday. I'll run them at 200 watts RMS x 2 (Bridged) to the front and rear speakers.


www.crutchfield.com

JL Audio JD400/4

JD Series 4-channel car amplifier — 75 watts RMS x 4
www.crutchfield.com
www.crutchfield.com

The sub box carpet arrived this morning and I wrapped the box. I've got to move some things around in the trunk to fit the sub box and make final connections. Should have everything together some time late next week.
 
38755


img_6483-jpg.38756


38758


R.I.P. Ralph Phillips 1956 - 2021
 
Looks like a nice amp. I was considering replacing mine with a higher RMS to keep the distortion down but had a hard time finding something small enough. I might give that one a try, you'll need to let me know what you think of it when you get it all together. :)
The JL JD amps are amazing. The JD series is brand new for this year and they were premiered at the 2020 CES. They have a built in gain level indicator to help you set the gain level. It's a bit of a process but not difficult. Let me know if you'd like more information. I highly recommend them Brandon.
 
Thanks so much Greg. I was curious if you want my old amps. I called and left you a message about them last week. Did you get it?

Funny you should mention the alternator. I got this handy test graph when I replaced it. I thought you'd find it interesting. I'll definitely check out the limits of the system. Thanks so much for the tips!

38759


R.I.P. Ralph Phillips 1956 - 2021
 

Similar threads

Back
Top