97 4.6 Coolant Leak Tracking (With Pics)

Joined
Dec 29, 2023
Messages
5
Location
West Coast
Vehicle Details
97 Thunderbird LX Sport
Country flag
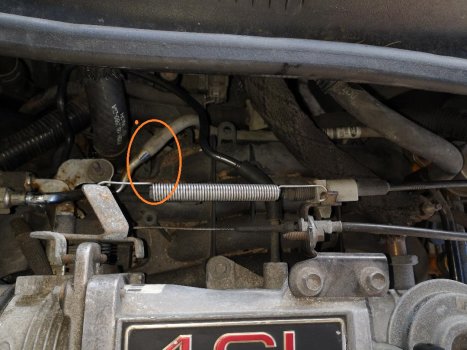
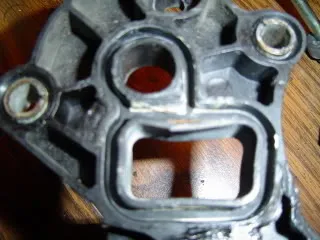
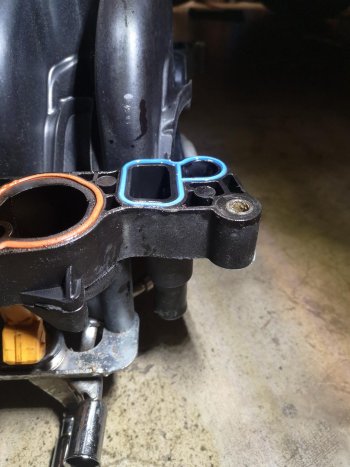
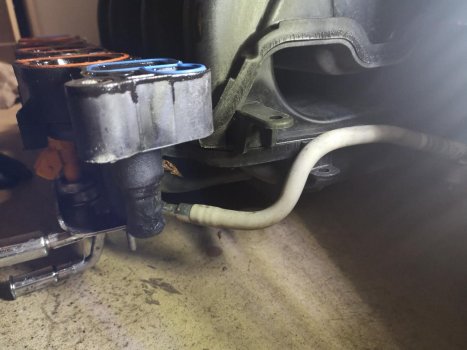
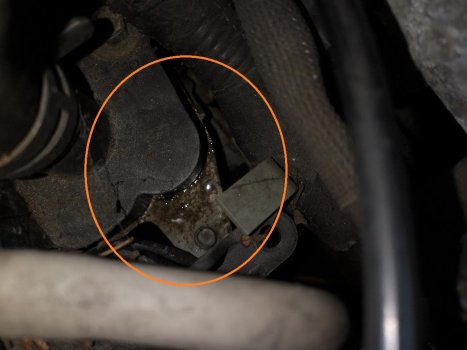
Parked the Tbird in a parkade recently and came out an hour later to find coolant leaking from the rear passenger side. Only leaks after a drive and then only when the motor is off for a few minutes, then coolant leaks from top and comes out underneath between the bellhousing and the oil pan. Looking on top, there's no coolant in the front of the valley, and only a bit in the rear valley after it starts pouring out. Found it coming out from the rear passenger side manifold near the coolant hose on top going into the firewall where it mounts to the head. Maybe a crack somewhere there or a poor install previously ? (intake has been changed once and it now has the improved dorman (615-178)with the non plastic front runner(crossovercoolant leak pic 4 intake.jpgcoolant leak pic 1 intake.jpg)). Since its a Dorman it should use the ring style gaskets - can I reuse them if the manifold has no cracks and its just the gasket?
 
Problem with the Dorman is you can't get those gaskets separately. I've found from experience that the gasket doesn't necessarily fail but the inner plastic lip. This happened to a Dorman I had, on the crossover side in this case

1703905999760.png
 
Dude; you should look up the PI intake swap. It used to be the same price as the original, and it improves performance a lot. It takes the powerband out to about 5500RPM instead of 4200.
EDIT: was going to add a link, but they are not available anywhere. Have they discoed the pi manifold? I guess it hasn't been on a production car since 2012...
 
Last edited:
Dude; you should look up the PI intake swap. It used to be the same price as the original, and it improves performance a lot. It takes the powerband out to about 5500RPM instead of 4200.
EDIT: was going to add a link, but they are not available anywhere. Have they discoed the pi manifold? I guess it hasn't been on a production car since 2012...

Looks that way, I last looked one up probably a year ago and they were on backorder, and last listed for double what they had previously cost(nearly $400 is absurd for a plastic intake) at this point I think it’s safe to say it’s been discontinued
 
Problem with the Dorman is you can't get those gaskets separately. I've found from experience that the gasket doesn't necessarily fail but the inner plastic lip. This happened to a Dorman I had, on the crossover side in this case

View attachment 2963
I have seen on Rockauto that you can get the Dorman intake gaskets separate for their intakes. However no one has the gaskets anywhere that go in between the crossover and the plastic intake.
 
RTV seals everything, lol. Lazarus was so pitted, I had to glue it on to keep it from leaking. I t has to be ultra black or copper to work on the head.
 
RTV seals everything, lol. Lazarus was so pitted, I had to glue it on to keep it from leaking. I t has to be ultra black or copper to work on the head.
So with the RTV, do you recommend putting it on the gasket or the plastic around the gasket? I pulled the Intake and it has no cracks or lip damage but bolt in that area (#7) was over torqued compared to the others I found when removing and gasket compressed more.
 
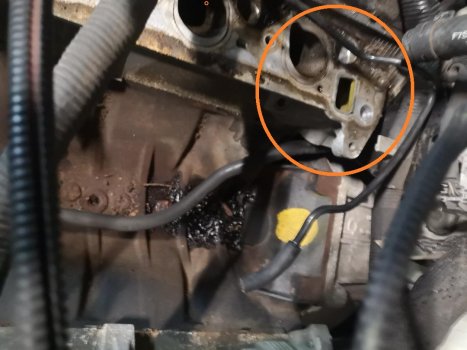
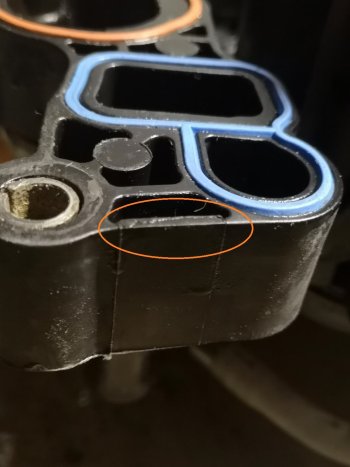
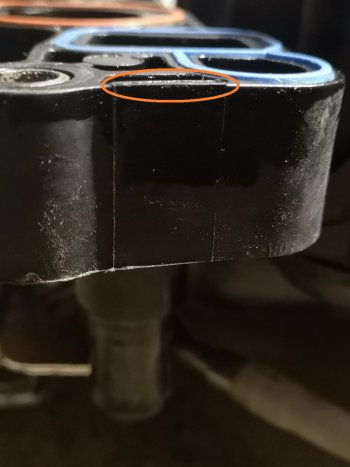
Pulled the intake manifold off today and inspected it. No cracks found on the intake manifold but I did noticed the bolt beside the rear passenger side where it would leak was torqued the most and pretty tight compared to the other bolts and the gasket compressed more in that area. Bad install perhaps? I've had the car for just about 3 years and it has run well. Car has 109,000KM or 68k miles only. What are the recomendations? Re-install with proper torque and sequence of tightening? RTV on the gasket in that corner where it leaked as well or not needed? A replacement set of gaskets (o-ring style) are not available seperately for the Dorman Intake Manifold in my area. Pics :
removed pic engine leak area.jpgremoved pic leak area pic 1.jpgremoved pic leak area pic 2.jpgremoved pic leak area pic 3.jpg
 
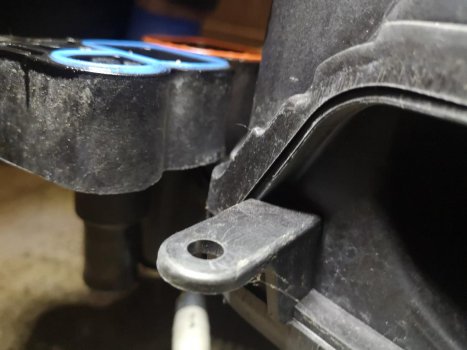
Found a slightly raised area on the end of the side the Intake Manifold was leaking from, will sand it down a bit to level before reinstalling. Possibly the reason it leaked in addition to the overtorqued bolt. In both pics you can see on the left side of blue gasket also, where the bolt was, gasket is noticibly compresses more as well . Pics :
intake casting deformity pic 1.jpgintake casting deformity pic 3.jpg
 
That is where the manifold always leaked on Lazarus. It would fill the #8 sparkplug well, and then start missing. I had to do several things; pick out the aluminum rust pits on the head flange, some 1/4"deep" fill them with rtv. I added a liberal coat of black rtv, glued the gasket to it, and let it dry. Then I applied rtv to the head flange, and torqued the manifold down. If you over torque any of the silicone gaskets they will leak.
Removing the passenger bolt from the stock 2 bolt alternator bracket, will also keep the alternator from moving the manifold around during high rpm shifts. An overrunning alternator pulley from a Crown Vic will help too.
Do you mean the #4 sparkplug well? Thats where mine leaked on the rear passenger side.

Reinstalled yesterday and used a small amount of black rtv around the coolant port gasket on the plastic intake (none on the actual gasket). Torqued to 18ft pounds as per the Dorman manifold instructions and in proper sequence and no more leak. Very happy I didn't need a new manifold and gave me a chance to install new spark plug wires and clean throttle body and plenum.
 
I use the right stuff and not RTV for this type of stuff

I use it for everything now that it’s more widely available. Waiting for Ultra Black to set before torquing seems so archaic 😆
 
I use it for everything now that it’s more widely available. Waiting for Ultra Black to set before torquing seems so archaic 😆
Diff cover gasket doesn't need to cure either. Fill it up and drive away.
 
Lol. The difference between those two types of rtv are important; The Ultra Black and Ultra copper are made for use on engines. the other stuff breaks down. I only like to do stuff once. The vinegar-smelling rtvs are the ones that killO2 sensors. Black and copper are similar to teflon after they cure.
RTV is room temperature vulcanizing rubber.
But Hey, 'yall do yall. :)

Right stuff is engine oil safe/sensor safe and durable, it's basically RTV black with a quick cure time.

@massacre Yep! I used it on my 4.30 pumpkin in a pinch, I used an old tube of ultra black but it was so old it never cured so I got a fresh tube of right stuff to button it together right away
 
+1 for Right Stuff! I buy it in caulk gun tubes for the shop, and that is literally all I use anymore, other than occasionally some ultra copper for exhaust flanges.
 

Similar threads

Back
Top