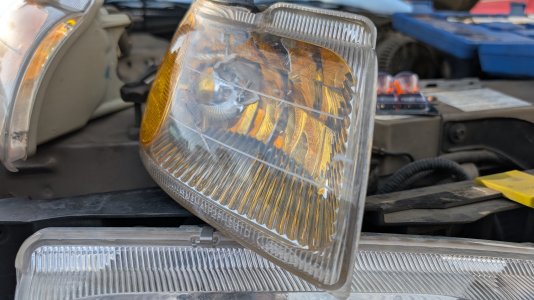
Thinking about getting this 97

On the Dorman intake, what is this gasket for? I imagine it's important...?

Like,.I know where it goes and how it sits, but is it important? And if so, how important is it?

1000000826.jpg
 
Looks like it's for the thermostat housing. On the OEM intakes it's just a rubber O-ring that sits on the top of the thermostat after you put it into the intake, before you bolt the outlet adapter on. I assume on the Dormans they want to you omit the OEM rubber gasket and use that instead.
 
It looks like the shape of the thermostat, however at least on our cars, that seals with an O-ring. Maybe on some other applications, they use a gasket, but if the O-ring seals, use that instead of the gasket.
 
It almost looks more like a graphite exhaust gasket, but it's definitely thermostat housing shaped. Could it be a spacer?
I thought it was graphite immediately, but unsure why
 
Maybe it is a thermostat spacer 🤔.

The kit also came with an O-Ring for the thermostat as well. If it is a spacer, what or why are reasons for me to want to use it?
 
Yeah... unless the new Dorman casting is sufficiently different compared to the OEM intakes (which I can't vouch for), I can't think of a reason to use it especially if they include the O-ring.
 
Ready for paint! Literally just finished the last wheel.

This project has definitely taken me much longer than I'd have liked simply because everyone and their mother here in my region seems to want my attention for one reason or another 😑.

I've taken them down to what appears to be the factory primer because some spots (as seen here) are down to the bare metal. My process up until now has involved applying HVAC cleaning solution, brushing in said solution, washing off said solution, then followed by 220 grit sanding, followed by 400 grit sandpaper.

All I know is that this would have been so much easier if I had taken them to get powder coated. But I'm being cheap and I can only pick two...
  • Fast
  • Cheap
  • Good

1000000909.jpg

1000000910.jpg

And as I am ready to post, I realized I still have the center caps, LOL 😂
 
Currently painting my wheels for my Gold Bird. First coat of Duplicolor Graphite Metallic down. Can't say I like the spray nozzle of the Duplicolor cans compared to the Rust-Oleum nozzle. I'll put more pictures up on my thread when this is more complete.

1000000916.jpg

1000000917.jpg

1000000918.jpg
 
Just got the second coat done and I can tell something is definitely going wrong with the application. The color itself is great for sure, but the application is.... off.

What are these "fuzzy" things and how do they get corrected? It's most predominantly in the center cap area, but there are some spots on the wheel face with them also showing.

1000000921.jpg

1000000922.jpg
 
Thanks for the advice!

I brushed off the fuzzies and applied another coat. The fuzzies did get corrected some and I can live with it, so now I know what to do moving forward. 90°, 29% humidity , and UV index of 9 for weather sure does make this dry real quick then!
 
Both clear coats on. I used up about 3/4 of one can for color and about 1/2 can for clear. It's definitely hot out right now and that 3rd coat of color definitely went on better, so like you said @MadMikeyL , it was just drying out before it even got on the wheel. I'll try again tonight for the next wheel and it being cooler should help with the application process better.

But for my first time painting wheels, I'm pretty happy! 🙂

Powder coating would have been better still, but yeah, lol.

1000000924.jpg
 
Just about done getting these wheels painted. Just need to wait for the current cost of clear to dry before applying the final coat of clear.

For having gotten them DIY painted, they came out alright. I'm not professional painter by any means and at close distance, you can tell. But, at 10ft, they look fantastic.

At some point in time, I think I will get these wheels powder coated, but right now is not that time.

Now that this phase is coming to an end, do I need to wait the stated 7 days of cure time before I can get tires mounted on these wheels? Or can I get the tires mounted today if I find a shop that's open?

1000000841.jpg

1000000934.jpg
 
I would definitely wait a week.

I prefer the exposed lug nuts look of these center caps.

I like the color. The finish is a bit blotchy in some spots, but as long as it looks good in person, that's what matters.

Did you position them vertically to paint?
Generally speaking, it's easiest to achieve an even spray from a can when you hold it vertically; therefore, you position the part to be painted vertically, as well.
 
Did you position them vertically to paint?

I did not position them vertically. Live and learn, I guess.

I think I will be getting these wheels powder coated before long. They look alright, but not great.

1000000937.jpg

@MadMikeyL good to know. Just sucks because I want to be driving the car already. That, and garage space is being taken up by my home projects too. So frustrating!
 
make sure the shop knows they are just painted so they can make sure to be extra careful mounting the tires.
1753043444783.png
Doesn't hurt to ask :LOL:


Good luck with that one.... Don't think I've ever had a new set of tires mounted without ending up with at least one scratched wheel.
 
I did not position them vertically.

Yeah, sorry, I should have made that point earlier.

Don't drive the car with the old dry-rot tires. They're a ticking time bomb. I know the wait is frustrating...

If you're absolutely not happy with the result, grab a bottle of acetone and just wipe the paint off the front fascia of one of the wheels. Position the rim vertically, e.g., on a block of wood; you may have tie it up from the back through the lug holes to keep it from tipping over. Then hold the can vertically and paint in uniform, thin coats to prevent any dripping; wait between coats. Don't apply clearcoat until you're satisfied with the color coat.
Always start spraying before sweeping across the wheel, and release the spray nozzle  after sweeping across the wheel. Never push down/release the nozzle while facing the wheel.
 
View attachment 13348
Doesn't hurt to ask :LOL:


Good luck with that one.... Don't think I've ever had a new set of tires mounted without ending up with at least one scratched wheel.
That was one of my concerns when I took my Cougar in for a balance, Costco would scratch the crap out of my painted rims. But I realized all the marks and scratch's are from ME trying to get the rim to fit over the lugs and screwing the pooch on that.
 
Yeah, sorry, I should have made that point earlier.

Don't drive the car with the old dry-rot tires. They're a ticking time bomb. I know the wait is frustrating...

If you're absolutely not happy with the result, grab a bottle of acetone and just wipe the paint off the front fascia of one of the wheels. Position the rim vertically, e.g., on a block of wood; you may have tie it up from the back through the lug holes to keep it from tipping over. Then hold the can vertically and paint in uniform, thin coats to prevent any dripping; wait between coats. Don't apply clearcoat until you're satisfied with the color coat.
Always start spraying before sweeping across the wheel, and release the spray nozzle  after sweeping across the wheel. Never push down/release the nozzle while facing the wheel.

I'm just done - and high on fumes - at this point. I'll live with it until I take them to get powder coated.
 
Back
Top