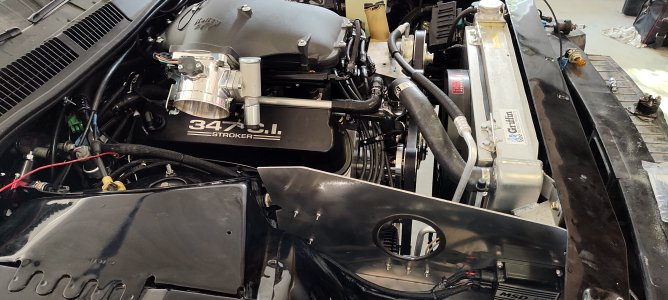
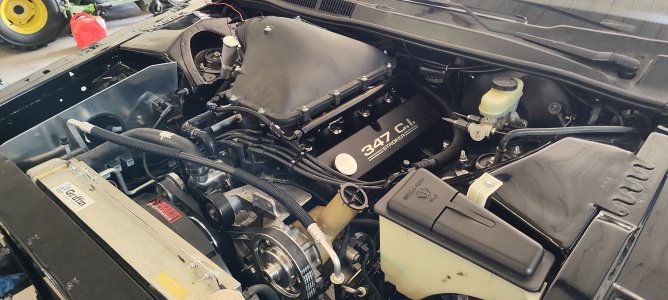
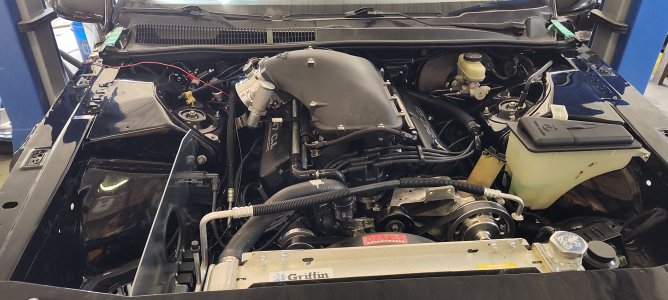
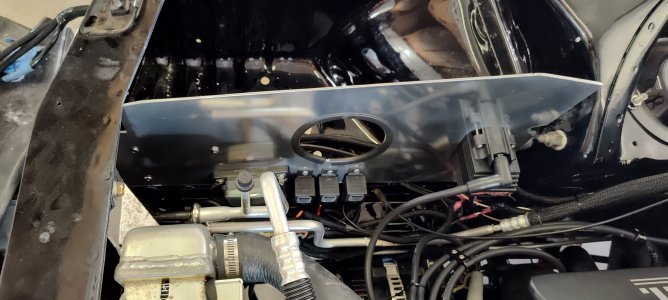
91 Cougar LS 5.0 Teardown and Build

Fantastic work! It's inspiration for me to get going on mine. Thanks for sharing.

Keep your eye on that trans line fitting. I had one like that and after a while the hose slipped off even with a flare on it. White smoke in my rearview mirror gave it away.
White smoke if you are lucky and watching your 6. Me however get to 4-way stop and then wonder what the hell when it doesn't want to go when revved to the moon. Yep. I learned they sell these adapter that arre barbed and they have a mechanical coupling w/ ferrule that tightens on the steel line and they are/were like $10 bucks in 2002.
 
View attachment 13941
I'm missing something that goes in this hole and I think it's for the vac lines that go to the a/c. Anyone have a pic of what I'm looking for?

That’s the passthrough for the ABS wiring (and ARC on early XR7s/SCs). If your car doesn’t have them there should just be a rubber plug there.
 
That’s the passthrough for the ABS wiring (and ARC on early XR7s/SCs). If your car doesn’t have them there should just be a rubber plug there.
Ok, at least I'm not going crazy. I do wonder of the vacuum lines should go there as I didn't see anywhere else to get the to the HVAC box like @theterminator93 terminator said
 
I need some help, I think I've said before electrical is not my strong suit. I'm needing to get my radiator fan wired in, and know I need a controller, or relays. My Holley Terminator X has 2 wires for fan signal(ground type), so I'm thinking relay is the better route. It's one fan, but has 2 speeds and therefore 2 power wires. Power one for low speed, and then both for high speed. So my question is; can I run 2 relays, with one for low speed, set to 185°(thermostat temp), and then the other to power the second wire at say 195°? That then would be high speed on my fan. Then second question; do I add a third relay for the A/C trigger, or do I just add that trigger to the low speed relay?
 
The two speed fan is throwing me off .. does it use both power wires for high speed; or one wire for each speed ( dual windings .. like the factory electric fan ) .. the Term X can control the fan(s) and probably has adjustable setpoints .. but it more than likely switches one trigger off between speeds and won't power two relays at the same time ( if thats how your fan needs to be wired. )
 
The two speed fan is throwing me off .. does it use both power wires for high speed; or one wire for each speed ( dual windings .. like the factory electric fan ) .. the Term X can control the fan(s) and probably has adjustable setpoints .. but it more than likely switches one trigger off between speeds and won't power two relays at the same time ( if thats how your fan needs to be wired. )
Yes, both power wires to get high speed.

And I think the 2 wires from the holley are separate to run 2 fans.
 
Wire it up with 2 relays, one for each speed. Use the Holley to control the ground side of the relay, and have each relay provide power, with both fans sharing a constant ground. For the AC, I would use a 3rd relay, triggered by the compressor clutch, and have that relay provide an alternate ground to the low speed fan relay. So when the compressor is on, it grounds out the low speed fan relay, which will turn on the low speed fan regardless of what the Holley is doing, and vice versa.
 
Wire it up with 2 relays, one for each speed. Use the Holley to control the ground side of the relay, and have each relay provide power, with both fans sharing a constant ground. For the AC, I would use a 3rd relay, triggered by the compressor clutch, and have that relay provide an alternate ground to the low speed fan relay. So when the compressor is on, it grounds out the low speed fan relay, which will turn on the low speed fan regardless of what the Holley is doing, and vice versa.
Ok, sounds good, thanks!
 
What actual fan are you using? The stock mn12 fan will run on the 40A bosch relays fine; a Mark fan will eat those in short order.
 
What actual fan are you using? The stock mn12 fan will run on the 40A bosch relays fine; a Mark fan will eat those in short order.

The stock 4.6 fan I had wouldn't quite fit my radiator to water pump clearance on my 5.0. thus the aftermarket fan.
 
Well, finally close to starting the car. Went to crank the starter and nothing. Thought I messed up the wires, and swapped them on the starter relay and nothing. Checked for power to the starter and solenoid with a remote trigger, and sure enough, power. Checked the wire inside the starter motor and it's broken. It's a brand new Powermaster high torque mini.

I'm not happy at the moment......
 
Amp Draw:

23.50 amps
That fan should run fine off a bosch relay.
 
Amp Draw:

23.50 amps
That fan should run fine off a bosch relay.
Yep, I got 3 25 Amp continuous draw relays. Once each for high and low speed, and then one for low speed with AC.
 
25A is lower than I would have gone; There's a surge when it first starts turning. The bosch 30 or 40A relays are cheap.
If it's a problem, it'll show up quick.
 
25A is lower than I would have gone; There's a surge when it first starts turning. The bosch 30 or 40A relays are cheap.
If it's a problem, it'll show up quick.
They are rated to 40A, and 25A continuous. 30 Amp fuses. Good news is I have them right by the fan so they'll be easy to swap if needed
 
Last edited:
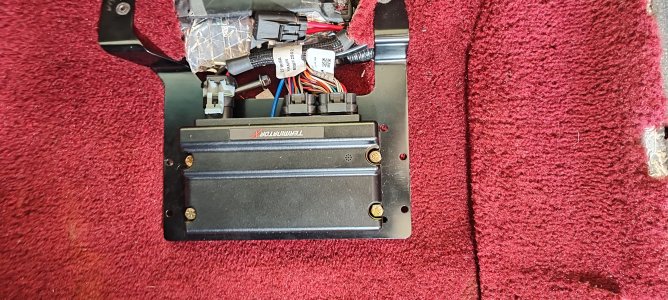
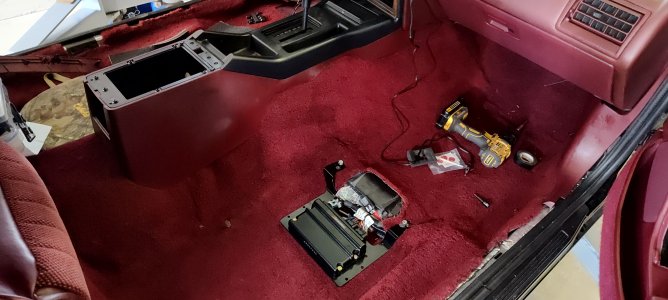
And the interior, got the console in, vacuum lines hooked up, interior lights, etc. Passenger side is nearly wrapped up, seat in, glove compartment, etc. First to take a pic after I finished that. But here's the Holley mounted under the seat.
1000001714.jpg
1000001713.jpg
And while I have your attention on the red(that most don't care for). Anyone ever find a leather/vinyl paint that's a close match?
 
:headbang:
View attachment 14382
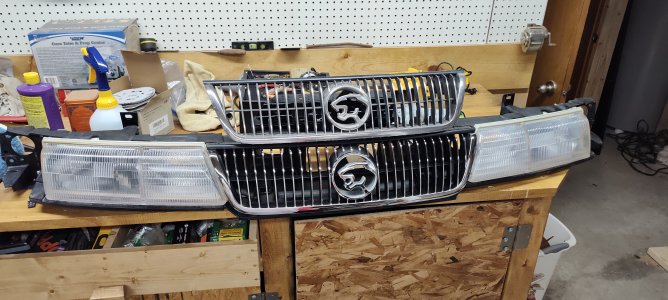
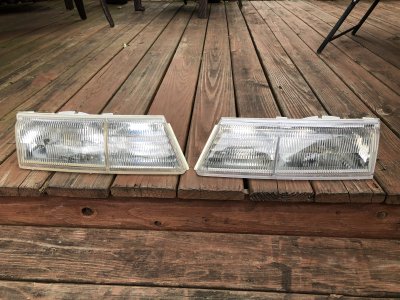
Headlights turned out pretty good for 34 y/o units. They look better off camera for summer reason but they aren't perfect either. The NOS grille, though =

Throwing them in an oven to get the yellow glue out helps get them near 100%. one on the left is stock glue, right is fresh clear silicone

IMG_3472.jpeg

Grille makes a big difference but if the chrome isn’t peeling you can usually polish it back to mirror and repaint the black with some careful masking.
 
Last edited:
Throwing them in an oven to get the yellow glue out helps get them near 100%. one on the left is stock glue, right is fresh clear silicone

View attachment 14384

Grille makes a big difference but if the chrome isn’t peeling you can usually polish it back to mirror and repaint the black with some careful masking.
That may be a winter project. I just want to drive it this year, at this point
 
How hot for disassembling them? I have a couple of sets to work with. I might make a fixture to resilver them.
 
350 for about 15 minutes seemed to be the sweet spot.

That may be a winter project. I just want to drive it this year, at this point

I hear that. I’ve had my car in perpetual project mode the entire summer, all the driving I’ve done has been shakedown tests around town, no car shows, nothing.
 
I should add the trick is to just get the glue to soften, it shouldn’t get so hot that the lens is ready to just fall off when you take it out of the oven, you still need to carefully pry it off but it will come off very easy once it gives. You also will have to get in and pry the glue out of the lens, it’s ludicrously thick(like 1/8”x1/8”). It sounds tedious but once you get it to lift in one spot you can usually pull it out in 2-3 huge chunks pretty quickly.

Wear welding gloves or even oven mits when you first start handling it, try to get it apart within a half hour, even if it starts cooling to room temperature in that time the the glue stays in a state that is much easier to remove than normal. The lens and housing actually probably stays in a less brittle state as well to make it less crack prone
I thought about taping those areas off and finding a paint similar to the housing color. I'd hate to F up unobtainable resources like cougar lights...
 
I thought about taping those areas off and finding a paint similar to the housing color. I'd hate to F up unobtainable resources like cougar lights...

Paint would screw them up more 😆 it really isn’t that risky, most precautions I recommend is not burning yourself and patience. If I didn’t destroy mine the first time separating them you shouldn’t either, and I’m a terrible cook lol
 
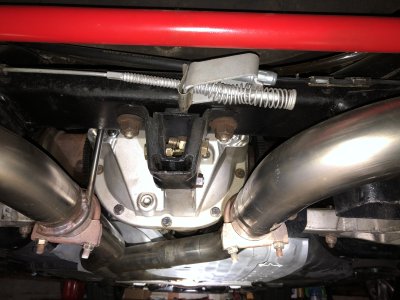
Anyone have a picture of how the rear parking brake cables come together in the spring and box?
 
Anyone have a picture of how the rear parking brake cables come together in the spring and box?

IMG_7525.jpeg

The cable from the interior lever clips to the box and connects to the passenger side caliper cable, while the adjustable spring end connects to the driver side caliper cable


And no I don’t know why I painted mine silver lol
 
View attachment 14416

The cable from the interior lever clips to the box and connects to the passenger side caliper cable, while the adjustable spring end connects to the driver side caliper cable


And no I don’t know why I painted mine silver lol
That spring is a hazard to my life.
 

Similar threads

Back
Top