You are using an out of date browser. It may not display this or other websites correctly.
You should upgrade or use an alternative browser.
You should upgrade or use an alternative browser.
Chingon's Engine Build
- Thread starter Chingon1
- Start date
- Joined
- Sep 12, 2023
- Messages
- 5,766
- Location
- Roselle, IL
- Cars in Garage
- 1
- Vehicle Details
- 1994 Cougar XR7 DOHC TR3650
@XR7-4.6 Thanks for the links! That’s definitely cheaper than rockauto. Did you rebuild it yourself?? I seen some videos and it doesn’t look too crazy, I got a quote for $500 labor onlyyea fucking right
Yeah I built it myself, it’s a little tedious finding the pattern but that’s the hardest part. The crush sleeve sucks too, I recommend just getting an eliminator kit
What do you mean eliminator kit? Sorry for the noob questionYeah I built it myself, it’s a little tedious finding the pattern but that’s the hardest part. The crush sleeve sucks too, I recommend just getting an eliminator kit
- Joined
- Sep 12, 2023
- Messages
- 5,766
- Location
- Roselle, IL
- Cars in Garage
- 1
- Vehicle Details
- 1994 Cougar XR7 DOHC TR3650
What do you mean eliminator kit? Sorry for the noob question
Crush sleeve eliminator. Basically instead of using a crush sleeve you have to crush with a shit ton of precise leverage to get the proper pinion preload you use a thick shim and a smaller shim(s) provided in the kit to accomplish the same thing without needing to crush anything and you don’t need to worry about overcrushing where you need a new sleeve and have to start over.
The tradeoff is it takes some trial and error, where the crush sleeve for a pro can take minutes. For me I set up my diff on a bench, I just plain couldn’t get enough leverage on it to crush before the pumpkin would fly out of my vice contraption, it’s easier to do in car with a lift.
Thanks for the reply, I watched a BUNCH of videos on the topic and it does seem pretty Str8 forward. I learn something new every time I’m on here hahaCrush sleeve eliminator. Basically instead of using a crush sleeve you have to crush with a shit ton of precise leverage to get the proper pinion preload you use a thick shim and a smaller shim(s) provided in the kit to accomplish the same thing without needing to crush anything and you don’t need to worry about overcrushing where you need a new sleeve and have to start over.
The tradeoff is it takes some trial and error, where the crush sleeve for a pro can take minutes. For me I set up my diff on a bench, I just plain couldn’t get enough leverage on it to crush before the pumpkin would fly out of my vice contraption, it’s easier to do in car with a lift.
- Joined
- Sep 12, 2023
- Messages
- 5,766
- Location
- Roselle, IL
- Cars in Garage
- 1
- Vehicle Details
- 1994 Cougar XR7 DOHC TR3650
Thanks for the reply, I watched a BUNCH of videos on the topic and it does seem pretty Str8 forward. I learn something new every time I’m on here haha
Also desitin is just as good a way to see gear pattern as the yellow compound. You have a newborn so take advantage


Grog6
Moderator
- Joined
- Sep 22, 2023
- Messages
- 4,769
- Location
- Harriman, TN
- Cars in Garage
- 1
- Vehicle Details
- 2x 1996 Cougars, 1997 Tbird 4.6's all.
I bolted one down to the drill press table, but my drill press is bolted solid too.
I knew it had other uses haha, what are those numbers you wrote on it??Also desitin is just as good a way to see gear pattern as the yellow compound. You have a newborn so take advantage
View attachment 16593View attachment 16594
that’s what I was thinking, bolting it down to the table top and go to town. Plan was to buy a JY unit and rebuild at home instead of doing mine.I bolted one down to the drill press table, but my drill press is bolted solid too.
Grog6
Moderator
- Joined
- Sep 22, 2023
- Messages
- 4,769
- Location
- Harriman, TN
- Cars in Garage
- 1
- Vehicle Details
- 2x 1996 Cougars, 1997 Tbird 4.6's all.
There's a table in the front of the FSM for the axle position on the door tag.
- Joined
- Sep 12, 2023
- Messages
- 5,766
- Location
- Roselle, IL
- Cars in Garage
- 1
- Vehicle Details
- 1994 Cougar XR7 DOHC TR3650
I knew it had other uses haha, what are those numbers you wrote on it??
The pinion shim thickness I used and backlash
FWIW I did make further efforts to secure the diff to the table trying to crush the sleeve but it got to the point that the whole bench was lifting.
Grog6
Moderator
- Joined
- Sep 22, 2023
- Messages
- 4,769
- Location
- Harriman, TN
- Cars in Garage
- 1
- Vehicle Details
- 2x 1996 Cougars, 1997 Tbird 4.6's all.
I have mine bolted to the concrete. My workbench is made of bolted 4x4s, and has held a 4.6 cougar block. Which is a poor choice, btw. I slid the block under the bench with the hoist after it rolled off.
- Joined
- Sep 12, 2023
- Messages
- 5,766
- Location
- Roselle, IL
- Cars in Garage
- 1
- Vehicle Details
- 1994 Cougar XR7 DOHC TR3650
I have mine bolted to the concrete. My workbench is made of bolted 4x4s, and has held a 4.6 cougar block. Which is a poor choice, btw. I slid the block under the bench with the hoist after it rolled off.
It’s easier to just use a crush sleeve eliminator

Grog6
Moderator
- Joined
- Sep 22, 2023
- Messages
- 4,769
- Location
- Harriman, TN
- Cars in Garage
- 1
- Vehicle Details
- 2x 1996 Cougars, 1997 Tbird 4.6's all.
Crush washers suck, I noted while I was trying to put a trak lok in a 7.5" diff. 
My neighbor had mercy, and helped me rebuild my stocker,in '10. If you can't reuse the side gears between a lok and non lok, my axles will suck getting out.
I feel better with the eliminator, it can't crush more under load.
My neighbor had mercy, and helped me rebuild my stocker,in '10. If you can't reuse the side gears between a lok and non lok, my axles will suck getting out.
I feel better with the eliminator, it can't crush more under load.
Thanks for the reply’s fellas I think the eliminator makes sense in ease of install.
So another questions homies, I just got the heads back from the shop where they hot tanked them. My question is how do I go about cleaning the surface of the heads to mate them to the block?? I’m trying to assemble by this week already. I’m getting real itchy to drive this biotch

So another questions homies, I just got the heads back from the shop where they hot tanked them. My question is how do I go about cleaning the surface of the heads to mate them to the block?? I’m trying to assemble by this week already. I’m getting real itchy to drive this biotch
Grog6
Moderator
- Joined
- Sep 22, 2023
- Messages
- 4,769
- Location
- Harriman, TN
- Cars in Garage
- 1
- Vehicle Details
- 2x 1996 Cougars, 1997 Tbird 4.6's all.
Whatever you paid for "hot tanking," you got ripped off.
Those look "sprayed off with hose. " I've got a set of C heads in the garage that I had tanked; they're clean aluminum. The ones I did in my sink was cleaner than those.
Those look "sprayed off with hose. " I've got a set of C heads in the garage that I had tanked; they're clean aluminum. The ones I did in my sink was cleaner than those.
Dang that sucks, how did you clean those in the sink?? I need to slap it back together asapWhatever you paid for "hot tanking," you got ripped off.
Those look "sprayed off with hose. " I've got a set of C heads in the garage that I had tanked; they're clean aluminum. The ones I did in my sink was cleaner than those.
- Joined
- Sep 12, 2023
- Messages
- 5,766
- Location
- Roselle, IL
- Cars in Garage
- 1
- Vehicle Details
- 1994 Cougar XR7 DOHC TR3650
They got hot tanked with the valves and plugs in place? That’s a little weird.
Honestly when I put PI heads on my car I basically sent them. I used a plastic scraper on the decks but even after that they looked the same as yours when I bolted them down
Honestly when I put PI heads on my car I basically sent them. I used a plastic scraper on the decks but even after that they looked the same as yours when I bolted them down
Last edited:
- Joined
- Sep 22, 2023
- Messages
- 1,676
- Location
- Waterloo, Iowa
- Cars in Garage
- 1
- Vehicle Details
- 1991 Mercury Cougar LS 5.0
Very light scotch brite and brake cleaner, but wear gloves.
Haha I was looking for this answerThey got hot tanked with the valves and plugs in place? That’s a little weird.
Honestly when I put PI heads on my car I basically sent them. I used a plastic scraper on the decks but even after that they looked the same as yours when I bolted them down
 I just cleaned em up with some scotch Brite and brake clean and they look a lot better. If you thuggee it out like that I should be good, thanks!
thank you I just got that done earlier today!!Very light scotch brite and brake cleaner, but wear gloves.
Grog6
Moderator
- Joined
- Sep 22, 2023
- Messages
- 4,769
- Location
- Harriman, TN
- Cars in Garage
- 1
- Vehicle Details
- 2x 1996 Cougars, 1997 Tbird 4.6's all.
I filled up a sink with tide, and soaked one side at a time, wasn't very effective on carbon. I bought a set of engine cleaning brushes from summit.
Second pass, I used simple green in water; That takes off the carbon.
Don't soak over ~15 minutes. Tide etches the surface, and eats the bearings out of throttle bodies and imrc's. Simple green puts a layer of phosphate on aluminum. looks dull, feels rough, and not good for a piston.
Second pass, I used simple green in water; That takes off the carbon.
Don't soak over ~15 minutes. Tide etches the surface, and eats the bearings out of throttle bodies and imrc's. Simple green puts a layer of phosphate on aluminum. looks dull, feels rough, and not good for a piston.
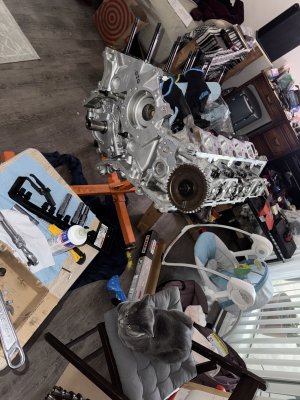
Got done installing the driver side head with the use ARP studs. When it came to the passenger, I couldn’t find 7 of the washers  gonna call ARP tomorrow and get some asap.
Installed drier side complete head with cam and exhaust manifold.
Itching to get it back to life!
gonna call ARP tomorrow and get some asap. Installed drier side complete head with cam and exhaust manifold.
Itching to get it back to life!
Attachments
I came across this and thought about you in regards to rebuilding your 8.8" yourself. I haven't seen this video, but his other videos are pretty good. This guy was on the old board and had a 4.6 3V swap T-Bird. Seems like a pretty good guy that knows his stuff.
FWIW, $500 in labor to rebuild a diff doesn't seem too off base, especially for where you live.
FWIW, $500 in labor to rebuild a diff doesn't seem too off base, especially for where you live.
Hey thank you for the link!! I’m gonna check it out.I came across this and thought about you in regards to rebuilding your 8.8" yourself. I haven't seen this video, but his other videos are pretty good. This guy was on the old board and had a 4.6 3V swap T-Bird. Seems like a pretty good guy that knows his stuff.
FWIW, $500 in labor to rebuild a diff doesn't seem too off base, especially for where you live.
$500 isn’t too crazy but when your B R O K E that’s too much haha
Got the heads installed yesterday finally after receiving the washers from summit. Timing chain is next and the cover right after.
Also I got this edlebrock intake off FB marketplace for $200 today along with that adapter from eBay that was $50 to my house. Pretty pumped, I know it’ll push the power band a lil higher than the stocker, on top of not having the possibility of breaking haha

Also I got this edlebrock intake off FB marketplace for $200 today along with that adapter from eBay that was $50 to my house. Pretty pumped, I know it’ll push the power band a lil higher than the stocker, on top of not having the possibility of breaking haha
- Joined
- Sep 22, 2023
- Messages
- 1,676
- Location
- Waterloo, Iowa
- Cars in Garage
- 1
- Vehicle Details
- 1991 Mercury Cougar LS 5.0
Not sure if you need to be worried about hood clearance or not with that. I assume you'll need a 90° elbow and a throttle body pointed to the passenger side.Got the heads installed yesterday finally after receiving the washers from summit. Timing chain is next and the cover right after.
Also I got this edlebrock intake off FB marketplace for $200 today along with that adapter from eBay that was $50 to my house. Pretty pumped, I know it’ll push the power band a lil higher than the stocker, on top of not having the possibility of breaking haha
- Joined
- Sep 12, 2023
- Messages
- 5,766
- Location
- Roselle, IL
- Cars in Garage
- 1
- Vehicle Details
- 1994 Cougar XR7 DOHC TR3650
Got the heads installed yesterday finally after receiving the washers from summit. Timing chain is next and the cover right after.
Also I got this edlebrock intake off FB marketplace for $200 today along with that adapter from eBay that was $50 to my house. Pretty pumped, I know it’ll push the power band a lil higher than the stocker, on top of not having the possibility of breaking haha
View attachment 16851
You’ll find out why he sold if for $200


Curious to see how you like the Edelbrock intake. I looked at those a while back, but was concerned I'd be losing too much low end.
Here is another good video on 8.8" stuff. He glosses over a few things, but overall it is pretty informative. I think he has a couple of other sub-videos dealing with reading the gear pattern.
Here is another good video on 8.8" stuff. He glosses over a few things, but overall it is pretty informative. I think he has a couple of other sub-videos dealing with reading the gear pattern.
Thank you for the video I appreciate itCurious to see how you like the Edelbrock intake. I looked at those a while back, but was concerned I'd be losing too much low end.
Here is another good video on 8.8" stuff. He glosses over a few things, but overall it is pretty informative. I think he has a couple of other sub-videos dealing with reading the gear pattern.
I found this dyno of a guy, with a boosted 4.6 running the stock PI intake then the edlebrock. From what he said and what the dyno shows, it looks like he didn’t lose ANY power down low but gain major up top. Here’s the graph see for yourself. In an NA you’d lose some but depends on your gear ratio if you’d actually see it.

Well that is true. I forgot you were running boost. That will definitely make a difference.
Similar threads
-
For Sale complete turbo kit for 89-97 3.8 Tbird/Cougar
- Started by Turbo Tbird
- Replies: 1
-

-
How much to sell my brother's '01 Grand Prix GT for that needs engine?
- Started by FordMan77
- Replies: 9
-
 95 Ford Thunderbird 5.0 V8 Lemons Car + Manual swap + all race spares (SF, CA) $6K
- Started by gunn
- Replies: 2
-