I'm sure someone can make a mistake like that, but I often wonder if it was an attempt at insurance fraud
Obliviousness. People's minds are elsewhere while driving.
I'm sure someone can make a mistake like that, but I often wonder if it was an attempt at insurance fraud
When I did assembly work any hardware that got dropped stayed there to the end of the shift an which point got thrown away. If it hit the floor it didn't get used. When I went to making Dies if the bolts came out they got replaced. Cheap insurance.Those Lorain assembly workers must have had pockets full of them to just fall out of
What's that "tree" that everyone is talking about?!
Anyone?
but if you don't have access to a welder
Mine are disabled for that exact reason. Pretty sure I'll never find an intact blue dash if I ever needed it.The airbags did not deploy, which is close to a death sentence for our cars.
Concrete jungle???Anyone?
Those are EVAP hoses. There used to be a write up on replacing all the vacuum hoses, with sizes and lengths listed. Maybe some one can point to that.
Those are EVAP hoses. There used to be a write up on replacing all the vacuum hoses, with sizes and lengths listed. Maybe some one can point to that.


SATC outside temperature sensor connector
I haven't posted much today because I was busy with this "project". Ultimately I couldn't finish it up, so the bumper cover goes back on tomorrow. Car is also due for an oil change, so I'll do that, too.
I figured I should replace them while I'm in there. Let's see how I feel tomorrow. So I would buy emissions hose, correct? What I saw at O'Reillys was awfully stiff.
As to the repairs, I took off the bumper cover and fender. No surprises in there. The spot welds looked intact. The Fender required a lot hammering to realign with the hood (there was a 1" gap). I replaced the absorber as well as the header panel.
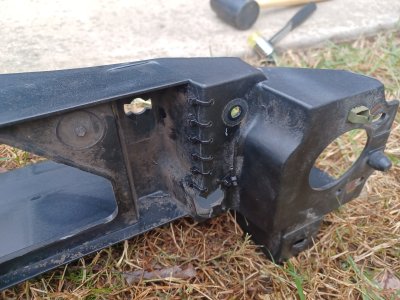
Finding that header panel took a drive to Virginia Beach. Even then, the best I could find had one crack, which I stitched together to prevent further breakage. Good thing, they only charged $16.
View attachment 9146
Still far better than mine, which was completely shattered on the left side.
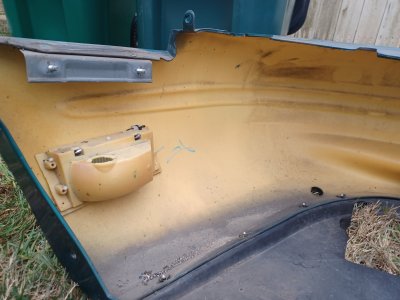
The bumper cover looked OK. No cracks in there. I used a heat gun in an attempt to revert some distortion in the curvature, which seemed to work. I was happy that those two rivets were still intact:
View attachment 9147
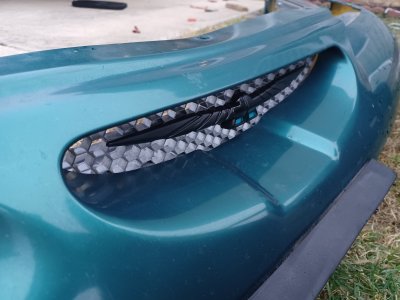
Oh, and when I got a bit tired of repairing stuff, I took some spray paint to the grille. The finish is a bit shitty, but seen from a distance, it creates nice contrast. It's either this, or I'll go for a floating bird like @MadMikeyL (could you post how you mounted the bird?), or I'll create a custom grille from metal mesh.
View attachment 9148
Zip tie stitches. That's brilliant! Nice work!
Ford 4.6L 5.4L V8 Vacuum Line / Emissions Hose Replacement
Detailed instructions on how to replace underhood vacuum hoses on Ford 4.6L V8 engines. Applies to many Fords like Mustang, Crown Vic, F150, Thunderbird, etc.www.blueovaltech.com
Footnote can't confirm the difference with the 3.8
