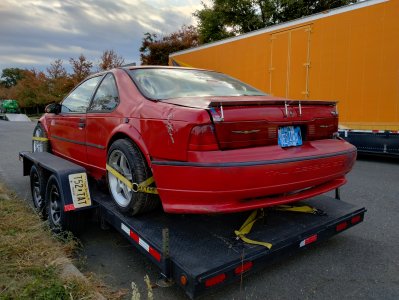
You are using an out of date browser. It may not display this or other websites correctly.
You should upgrade or use an alternative browser.
You should upgrade or use an alternative browser.
No mistakes, just happy accidents
- Thread starter Wile E. Coyote
- Start date
- Joined
- Sep 21, 2023
- Messages
- 706
- Location
- NJ
- Vehicle Details
- 1996 Tbird LX, SVO blown 4.6 // 1990 Tbird SC Drift missile, OHV 5.0
Possibly. I was working on the car again today, and noticed the relay for the high side fan has melted. So that probably has something to do with what happenedAnother thought, ow about a fan on the front of the rad to push air into it?
- Joined
- Sep 21, 2023
- Messages
- 706
- Location
- NJ
- Vehicle Details
- 1996 Tbird LX, SVO blown 4.6 // 1990 Tbird SC Drift missile, OHV 5.0
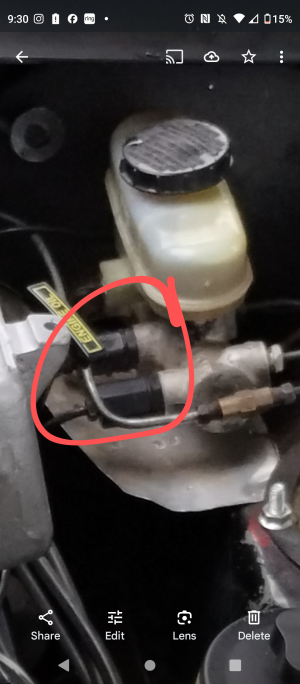
I need someone to tell me what these things I circled are.
The booster and master in the red car are from a 94 cougar V6 with an 8.8 and I believe disc brakes.
I never had thought anything of them, but now as I am searching for new masters and seeing those missing, I'm curious. I have no idea why they are there or why there would be two.
Also if someone could tell me which way the lines are supposed to be routed on a master cylinder of this type, that would be great. Because I currently have the front brakes tied into the two most forward outlets (driver side on the right front, passenger side on the left front) and the rear line with inline hand brake on the rear left side.
Thanks
- Joined
- Sep 12, 2023
- Messages
- 5,033
- Location
- Roselle, IL
- Cars in Garage
- 1
- Vehicle Details
- 1994 Cougar XR7 DOHC TR3650
Proportioning valves, those two go to the rear to keep the rear brakes from locking up
- Joined
- Sep 21, 2023
- Messages
- 706
- Location
- NJ
- Vehicle Details
- 1996 Tbird LX, SVO blown 4.6 // 1990 Tbird SC Drift missile, OHV 5.0
Could they also operate as a check valve? The inline handbrake I have back feeds the main master a little, so I'm thinking I should switch my rears to one of those PVs.Proportioning valves, those two go to the rear to keep the rear brakes from locking up
Last edited:
Grog6
Moderator
- Joined
- Sep 22, 2023
- Messages
- 4,279
- Location
- Harriman, TN
- Vehicle Details
- 2x 1996 Cougars, 1997 Tbird 4.6's all.
hand and foot brakes are cable driven, they turn a cam inside the rear diskcaliper to mechanically push the piston out.drums are similar, but drum brakes "self assist", proportionally to braking effort. (the leading pad is torqued into the drum by the friction, and shape of pad, and pivot location).
It's much easier to lock drum brakes.
It's much easier to lock drum brakes.
Last edited:
- Joined
- Sep 21, 2023
- Messages
- 706
- Location
- NJ
- Vehicle Details
- 1996 Tbird LX, SVO blown 4.6 // 1990 Tbird SC Drift missile, OHV 5.0
You are forgetting I have a hydraulic handbrake for my drift car. It's tied into the system going to the rear brakes so I can lock them up at 80mphhand and foot brakes are cable driven, they turn a cam inside the rear diskcaliper to mechanically push the piston out.drums are similar, but drum brakes "self assist", proportionally to braking effort. (the leading pad is torqued into the drum by the friction, and shape of pad, and pivot location).
Grog6
Moderator
- Joined
- Sep 22, 2023
- Messages
- 4,279
- Location
- Harriman, TN
- Vehicle Details
- 2x 1996 Cougars, 1997 Tbird 4.6's all.
Yes, I did not know that. You know what you're doing, lol.
- Joined
- Sep 21, 2023
- Messages
- 706
- Location
- NJ
- Vehicle Details
- 1996 Tbird LX, SVO blown 4.6 // 1990 Tbird SC Drift missile, OHV 5.0
Only enough to get myself into trouble lol. Now I'm trying to see if I can do a little better with what I have, or if I need to change more things.Yes, I did not know that. You know what you're doing, lol.
Grog6
Moderator
- Joined
- Sep 22, 2023
- Messages
- 4,279
- Location
- Harriman, TN
- Vehicle Details
- 2x 1996 Cougars, 1997 Tbird 4.6's all.
In that application, you're riding the edge of the traction equation, and it's non-linear as hell. I'd think a variable valve might help you, but idk how that would work.
- Joined
- Sep 21, 2023
- Messages
- 706
- Location
- NJ
- Vehicle Details
- 1996 Tbird LX, SVO blown 4.6 // 1990 Tbird SC Drift missile, OHV 5.0
- Joined
- Sep 21, 2023
- Messages
- 706
- Location
- NJ
- Vehicle Details
- 1996 Tbird LX, SVO blown 4.6 // 1990 Tbird SC Drift missile, OHV 5.0
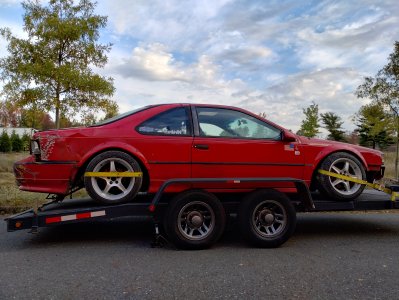
The red cars life support rebuild will be documented here.
General agreement among my friends and drift guys is that I should fix the car. Apparently it's now been "christened".
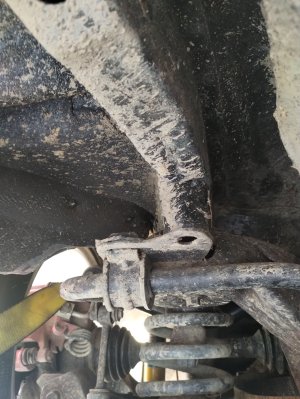
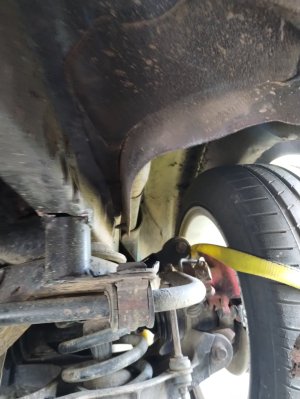
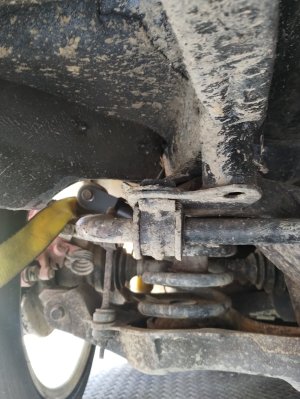
Attached are further photos of the damage.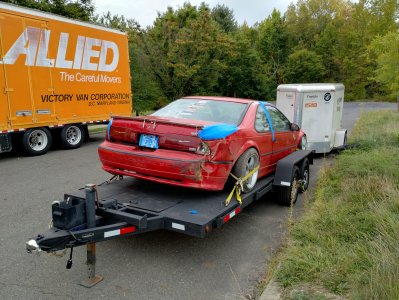
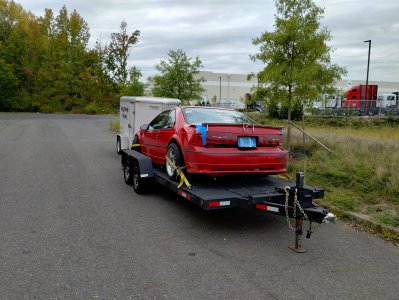
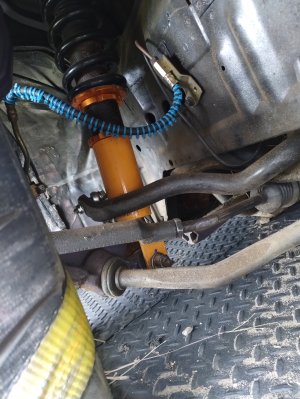
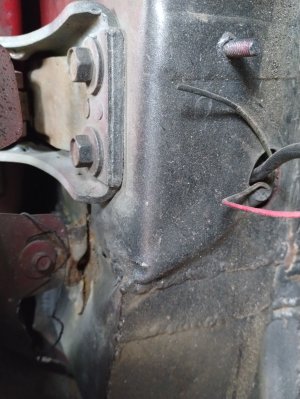
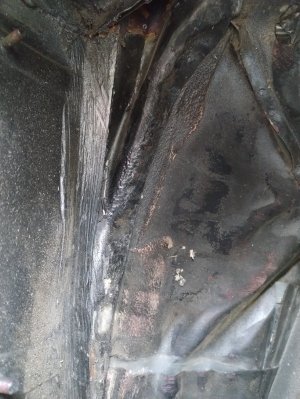
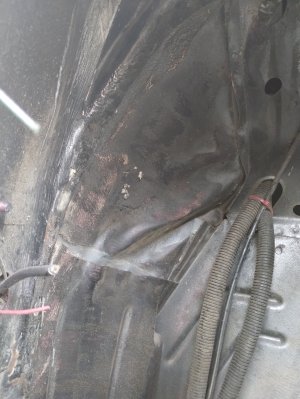
Things NOT pictured is the upper frame rail buckle, the PS side fire wall buckle, and PS side torque box flex.
First step: new LCA and wheels on so it can get off the trailer and back into the garage. Then I can get the car on stands, remove the door and fender, and see just how far it goes.
General agreement among my friends and drift guys is that I should fix the car. Apparently it's now been "christened".
Attached are further photos of the damage.


Things NOT pictured is the upper frame rail buckle, the PS side fire wall buckle, and PS side torque box flex.
First step: new LCA and wheels on so it can get off the trailer and back into the garage. Then I can get the car on stands, remove the door and fender, and see just how far it goes.
- Joined
- Sep 21, 2023
- Messages
- 706
- Location
- NJ
- Vehicle Details
- 1996 Tbird LX, SVO blown 4.6 // 1990 Tbird SC Drift missile, OHV 5.0
Unfortunately no. If it comes to that point I'll have the guy who builds the cage do that as well.Very excited to see the rebuild and what you do. If you end up tubing the rear do you think you'll document well enough to be able to reproduce it?
- Joined
- Sep 21, 2023
- Messages
- 706
- Location
- NJ
- Vehicle Details
- 1996 Tbird LX, SVO blown 4.6 // 1990 Tbird SC Drift missile, OHV 5.0
- Joined
- Sep 21, 2023
- Messages
- 706
- Location
- NJ
- Vehicle Details
- 1996 Tbird LX, SVO blown 4.6 // 1990 Tbird SC Drift missile, OHV 5.0
Quote received. $1500, which is on the low end of what I was willing to spend.
Setting up times now. I am getting my wisdom teeth out Wednesday, so I won't be doing anything until the 5th at least. And I will need to get the LCA, tie rod, and wheels replaced before it goes in. Stuff I can do on the trailer, but I unfortunately don't have the time this weekend to complete it.
Setting up times now. I am getting my wisdom teeth out Wednesday, so I won't be doing anything until the 5th at least. And I will need to get the LCA, tie rod, and wheels replaced before it goes in. Stuff I can do on the trailer, but I unfortunately don't have the time this weekend to complete it.
Last edited:
- Joined
- Sep 12, 2023
- Messages
- 5,033
- Location
- Roselle, IL
- Cars in Garage
- 1
- Vehicle Details
- 1994 Cougar XR7 DOHC TR3650
Frame machine and intense dental work, I think you and that car have a genuine bond.
- Joined
- Sep 21, 2023
- Messages
- 706
- Location
- NJ
- Vehicle Details
- 1996 Tbird LX, SVO blown 4.6 // 1990 Tbird SC Drift missile, OHV 5.0
Starting to feel like it lol.
- Joined
- Sep 21, 2023
- Messages
- 706
- Location
- NJ
- Vehicle Details
- 1996 Tbird LX, SVO blown 4.6 // 1990 Tbird SC Drift missile, OHV 5.0
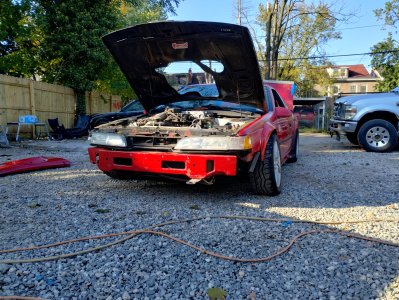
Dropped the car off at the body shop/ frame shop today. Steering is very tough, so I'll have to look at that. And the engine also has zero power when trying to accelerate, and stalled multiple times just trying to get up the little grade in their driveway. I'm gonna guess that a fuel line got crushed when the wheel was shoved into the firewall.
- Joined
- Sep 22, 2023
- Messages
- 1,453
- Location
- Waterloo, Iowa
- Cars in Garage
- 1
- Vehicle Details
- 1991 Mercury Cougar LS 5.0
That makes sense given it seemed fine prior. Interested to see how straight the body gets when the frame is straight.
Last edited:
- Joined
- Sep 21, 2023
- Messages
- 706
- Location
- NJ
- Vehicle Details
- 1996 Tbird LX, SVO blown 4.6 // 1990 Tbird SC Drift missile, OHV 5.0
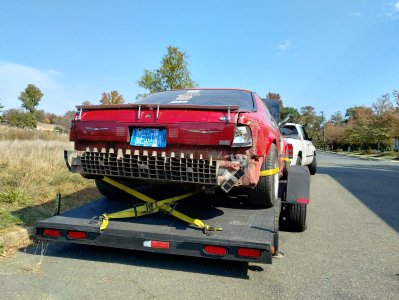
Got the car back today. Only took one photo cause I'm pretty upset with what got done for the money but whatever. Front end is still crunched cause he decided it couldn't be pulled, just replaced, but still charged me the amount he had quoted me for everything.
Rear is back in line and is good enough for a drift car, but not for me.
Currently speaking with a few guys to potentially use my gold car as a base to make a rear end mold. Unfortunately my friend ran into issues on his end and the panels he was making will be pushed back for a while.
- Joined
- Sep 22, 2023
- Messages
- 1,453
- Location
- Waterloo, Iowa
- Cars in Garage
- 1
- Vehicle Details
- 1991 Mercury Cougar LS 5.0
Getting work like this or rust repair done these days is crazy expensive. Most people don't do it, so those that do charge enough to ensure they make good money.
Good news is you should be able to get a front clip, cheap enough, bag news is it may not be as quick as you want.
Good news is you should be able to get a front clip, cheap enough, bag news is it may not be as quick as you want.
- Joined
- Sep 21, 2023
- Messages
- 706
- Location
- NJ
- Vehicle Details
- 1996 Tbird LX, SVO blown 4.6 // 1990 Tbird SC Drift missile, OHV 5.0
Getting work like this or rust repair done these days is crazy expensive. Most people don't do it, so those that do charge enough to ensure they make good money.
Good news is you should be able to get a front clip, cheap enough, bag news is it may not be as quick as you want.
The front I can deal with for now. But the rear, door sealing, and engine are all fighting for the number one spot on the priority list.
- Joined
- Sep 21, 2023
- Messages
- 706
- Location
- NJ
- Vehicle Details
- 1996 Tbird LX, SVO blown 4.6 // 1990 Tbird SC Drift missile, OHV 5.0
Don't you love it when people charge a ton to do work and then do a terrible job on top of it. I think we've all been there at some point. 
- Joined
- Sep 12, 2023
- Messages
- 2,421
- Location
- North Ridgeville, OH
- Cars in Garage
- 2
- Vehicle Details
- 1997 Thunderbird 4.6, 1998 Mark VIII LSC
Yep, happened to me with both my (current) cars... 

- Joined
- Sep 12, 2023
- Messages
- 5,033
- Location
- Roselle, IL
- Cars in Garage
- 1
- Vehicle Details
- 1994 Cougar XR7 DOHC TR3650
Unless you’re talking the money is no object car restoration biz, in which case there’s a very skewed ratio of ethics in and of itself, the auto body industry is primarily one of band aids and hackery preying on customers who will be rid of the car before their poor repairs bite them on the ass and it’s the next owners problem.
In some ways, not necessarily in what you’ve spent mind you, at least you know what you have. A lot of times a straightened and seemingly perfectly fixed looking body looks exactly like that underneath all the mud the body shops slather over it. You may not be satisfied with the looks( as I wouldn’t) but at the very least at least there’s little bullshit. It’s presumably straightened, no more no less.
In some ways, not necessarily in what you’ve spent mind you, at least you know what you have. A lot of times a straightened and seemingly perfectly fixed looking body looks exactly like that underneath all the mud the body shops slather over it. You may not be satisfied with the looks( as I wouldn’t) but at the very least at least there’s little bullshit. It’s presumably straightened, no more no less.
- Joined
- Sep 21, 2023
- Messages
- 706
- Location
- NJ
- Vehicle Details
- 1996 Tbird LX, SVO blown 4.6 // 1990 Tbird SC Drift missile, OHV 5.0
That's exactly what he said, if he was painting it he would have used bondo. To which I told him adding inches upon inches of bondo isn't fixing a car.In some ways, not necessarily in what you’ve spent mind you, at least you know what you have. A lot of times a straightened and seemingly perfectly fixed looking body looks exactly like that underneath all the mud the body shops slather over it.
Either way, yes. The car is mostly straightened. The rear crash bar is pointed down on the passenger side, and the rails are kinked. But it's at least where things are supposed to be. Like I said, it's good enough to start getting chopped apart.
- Joined
- Sep 21, 2023
- Messages
- 706
- Location
- NJ
- Vehicle Details
- 1996 Tbird LX, SVO blown 4.6 // 1990 Tbird SC Drift missile, OHV 5.0
Question for everyone: has anyone actually made the swap from TEVES ABS to non ABS using the "bolt in" 1991 crown Vic booster, or is it completely a myth?
- Joined
- Sep 12, 2023
- Messages
- 5,033
- Location
- Roselle, IL
- Cars in Garage
- 1
- Vehicle Details
- 1994 Cougar XR7 DOHC TR3650
Question for everyone: has anyone actually made the swap from TEVES ABS to non ABS using the "bolt in" 1991 crown Vic booster, or is it completely a myth?
Booster or master? I assure you it’s no myth. However the better way to do is is using the standard 89-92 Thunderbird booster and 4 port master cylinder and simply blocking off the fourth port with a bleeder. If you can get the lines off the stock ABS master without destroying them it’s literally plug and play with some minor rebending. That’s how I’ve done it

