What did you do with your Thunderbird Today?

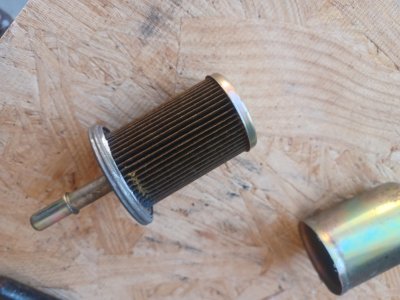
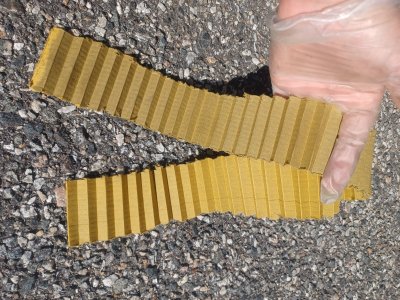
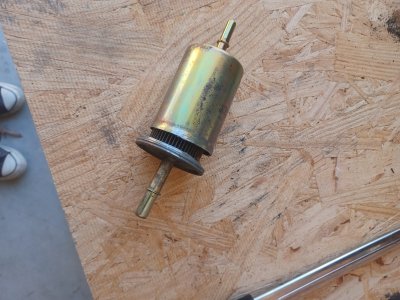
In the name of science, I cut open the fuel filter I replaced the other day. This one has a bit over 40,000 miles on it.

And what you see is...that you don't see much. After drying it for a few minutes in the sun, the tank side is distinctly darker than the engine side, but that's about it. If you see any metal bits, that's just from cutting.

20251031_120417.jpg20251031_120429.jpg20251031_121411.jpg
 
In the name of science, I cut open the fuel filter I replaced the other day. This one has a bit over 40,000 miles on it.

And what you see is...that you don't see much. After drying it for a few minutes in the sun, the tank side is distinctly darker than the engine side, but that's about it. If you see any metal bits, that's just from cutting.

View attachment 15209View attachment 15210View attachment 15211
I cut mine open after 105,000 miles and there was a lot more shmoo on my filter, the fuel I also dumped out of it was black
 
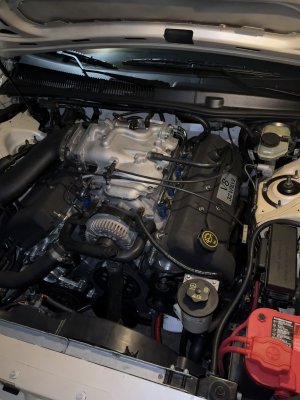
You all remember early this month I refinished the left Ford GT coil cover that got brake fluid on it? Well I didn’t like the result compared to what it used to be, the wrinkles were kind of inconsistent and retained a very dark glossy look that doesn’t match the main valve cover well….
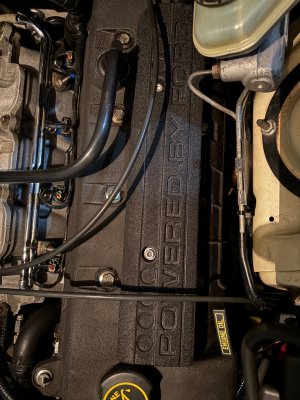
IMG_7810.jpeg

I’m kind of over the GT coil covers anyway (at least in this finish, subtle coolness aside they’re kind of wasted just black) so today I decided to use up the can of wrinkle paint on a regular set of coil covers with a better technique, which I now suspect I did on the valve covers originally back then, and the result is pretty excellent
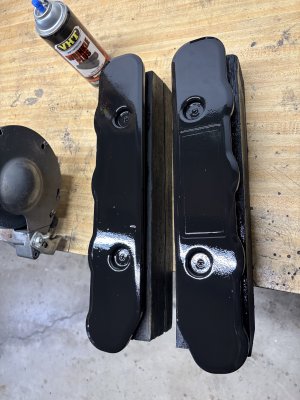
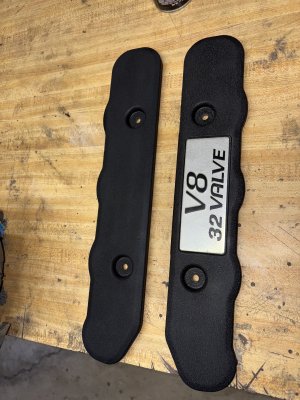
IMG_7806.jpeg
IMG_7809.jpeg


My recommendation, DO NOT follow the instructions on the can directly. The horizontal - vertical - diagonal pattern for each coat does work better than one direction only but do it backwards, it is way more likely to tiger stripe ending on a diagonal IME.

The can says thick coats… don’t do thick coats. Light for the first and light to moderate for the next two results in much tighter wrinkles and a more matte finish in the end. I also suggest waiting 10 minutes rather than 5 minutes between

Heat up the can. I have found this to really help avoid spatter from rattlecans and I tend to get better coats from it in general, but with this thick wrinkle paint it helps a ton for keeping the nozzle flowing. All you do is fill up a bucket with hot tap water and submerge the can in it with a weight on top for about 20 minutes.

After your last coat wait 30 minutes and hit it with a heat gun. Just go around it fairly evenly and just focus on getting the metal warm rather than worry about what the paint’s doing(don’t just point it at a stubborn spot that’s not wrinkling). Once it’s mostly wrinkled just stop and wait and the heat still in the metal will usually pop the areas that weren’t wrinkling eventually.

If there are areas that don’t wrinkle after this, don’t follow the cans instructions about touching up just the stubborn spot, it looks like crap trust me, instead just hit it with another full coat on the piece. The paint melts back into itself and it’ll rewrinkle evenly as long as you’re doing this within an hour or two of the last coat
 
Last edited:
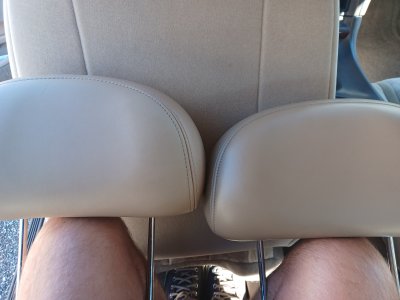
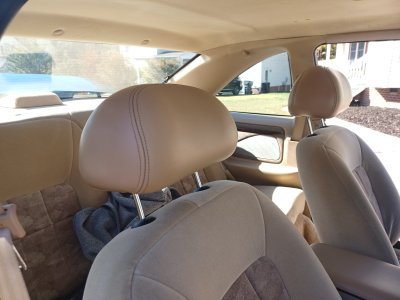
Replaced my headrests with true Light Prairie Tan units from the Mark VIII (my previous headrests being grey units painted with beige Dupli-Color Vinyl and Fabric).

The difference is subtle in pictures, but noticeable enough in person to justify the effort. The painted units (right knee) were slightly too dark and greenish while stock (left knee) is lighter and more reddish.

20251101_115603.jpg20251101_131538.jpg
 
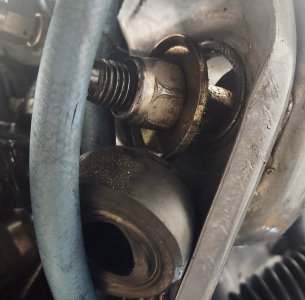
I converted to the working oil pressure gauge about 10 years ago, it wasn’t reading anymore,
So I changed the connector on the oil pressure sensor, while I was there I figured I’d snug up the sensor too, good thing I did, it was pretty loose. 😳
 
I parked it with fresh gas and stabilizer, pulled the battery (which I probably need to replace), and tomorrow the cover goes on. Then I made the sad realization that I might have to leave it parked next summer too as I will probably be doing school over the summer and won't have time to pull it out and work on it, cause I was driving it and it feel like it needs to have a thorough look over to see what needs fixing to make it a more confident driver. but that's a next spring issue.
 
I parked it with fresh gas and stabilizer, pulled the battery (which I probably need to replace), and tomorrow the cover goes on. Then I made the sad realization that I might have to leave it parked next summer too as I will probably be doing school over the summer and won't have time to pull it out and work on it, cause I was driving it and it feel like it needs to have a thorough look over to see what needs fixing to make it a more confident driver. but that's a next spring issue.

I’d just plan a preemptive effort to make it reliable, rebuild the front suspension and just go ahead and yank the head gaskets replace them and replace the bolts with studs. That’s basically all you have to worry about anyway. Anything else is less critical and fixable on the fly. Cars don’t like to sit and project creep often leads to project fails… “I’ll fix it up someday!” Says the 70 year old who parked their “project” at 25.
 
I’m calling out a few people I know personally that won’t see this….. but yes, also heed my warning! 😆

My thing has always just been about resources. I have a full on plan that I am slowly materializing. So while it has been a "someday" thing on a technical level, it is a "it's happening" on a realistic action plan.

I just need the rest of my braking system components as outlined in my thread.

And then there are days where - as much as I enjoy it - I think I should sell Gold Bird just to make Dirty Bird a reality. She drives so nice though, and going back to driving my Honda, she's so...... crude. But my Honda needs help too, and she's sticking around because my kids are almost old enough to drive.

Bah.

Anyway, that's that's the long version of "I feel called out", LOL.
 
I’m calling out a few people I know personally that won’t see this….. but yes, also heed my warning! 😆
I have one of those projects that I didn't finish due to getting married and raising 3 younguns. They are mostly grown and I'm 5 or so years from retiring so it is my retirement project.8-)
 
I talked to someone today, and T-Bird plans came about. He agreed to help out, but I need to provide solid designs first.

This plan can be applied to any MN12 owner once this is done 😀.
 
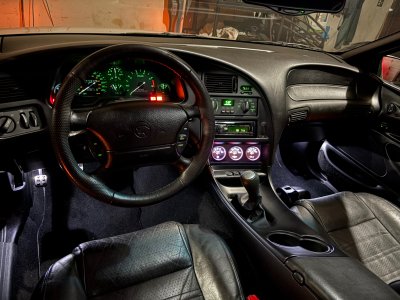
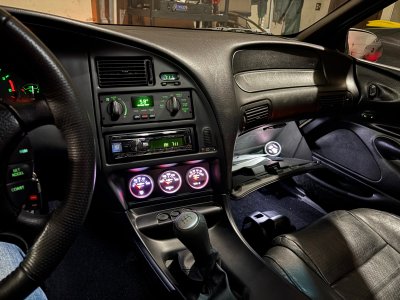
Scored a haul of interior trim parts from the wreckers as my trip to see a 1996 "blue" Bird turned into it being an Alpine Green example (a mistake I've had a lot of people make with my own car). Lots of nice interior plastic to take, including the driver's seat button panel in perfect shape.
 
How's the center console and cluster surround? Grab those too if they're in good condition.
 
How's the center console and cluster surround? Grab those too if they're in good condition.

Completely gone. Engine bay was empty of almost everything including the block and hood actuator, inside door panels gone: pretty picked over, all told.

But there was a metal strip for the upper rear window molding held on by clips that seemed to fit perfectly, so I grabbed that. I thought that molding was always a breakable rubbery sort of stuff.
 
Coil covers seem sufficiently cured so I threw them in.

IMG_7816.jpeg

So between these $20 junkyard ones and the $500 GT ones the switch to me is pretty much….neutral

Anyone want to buy these old ones? 😁
 

Similar threads

Back
Top