XR7-4.6's Disjointed Build Thread

XR7-4.6

Administrator
Staff member
Joined
Sep 12, 2023
Messages
2,861
Location
Roselle, IL
Vehicle Details
1994 Cougar XR7 DOHC TR3650
Country flag
Moving right along to the bigger project...

So SC pedals are hard to come by and since I'm cheap but brilliantly resourceful? I figured I'd try improvising with one of the missing links of the upcoming 5 speed swap - Modding an auto brake pedal into a stick pedal.

Now the easy peazy solution, and the perfectly acceptable one at that, would be to simply trim the ends off and slip on a smaller pedal pad. In fact, that's not far off what Ford did from 89-92, albeit with a different metal pedal pad. But my Cougar is a 94 and Ford substantially changed the pedal layout for the 93-95 SCs(along with the cage, booster and firewall for the Teves IV ABS system) and me being as picky as I am wanted the newer rarer layout with the brake pedal tucked right along side the accelerator, as seen here...

37943


This pic of course is from the MN12performance archive, I used many pictures from it as a reference for my little retrofit, including the Mustang pedal template as well as a general reference for angles and such (I'll also be using those pedal covers when all is said and done).


First thing I did was find the centerline of the stock auto pedal using masking tape paralleling the pedal arm and marking the specific center with a sharpie.
37246


Next I laid the template to correspond with the centerline. I used the pictures of the back of the pedal in the archive to determine the center and angle of the pedal pad template in relation to the pedal arm, the second pic below you can see the pencil marks I drew. I also glued it down

37247


37248


Now the fun part, I had to bend the pedal arm until the top of the template was parallel with the pivot. This proved to be harder than I thought and tried everything to bend this chunk of 3/8" steel from a BFH and heat to brute force, trial and error brought me to this...

37249


A vice a vice and a big ass wrench with me pogoing on the end(too bad I couldn't get a pic of that lol).

*Note if anyone tries to attempt this make sure to position the arm in the vice so the cruise switch bracket portion won't get bent, otherwise the geometry of everything will be thrown off.


Now that the arm is bent to my satisfaction I let the carnage begin.

37250


37251


Since the auto pedal has a wide diamond shaped stamping vs the manual pedal's round one I had to do some grinding for the pad to fit.

37252


And all done:)

37253


Took about an hour total. Tools used: Vice, another vice, BFW(big ****ing wrench), bench grinder, a coarse file and some black paint since it got pretty dinged up in the process.
 
Before:

37242


After:

37243


If anyone was watching chatbox earlier, you'll know what I was drilling now.?

Oh, and let me just say - ** RYOBI AND ** THE INVENTORS OF THE CORDLESS DRILL, ** YOU! ** YOU!! ** YOU!!! ** YOU!!!!!!!! ... That is all :D
 
Well I got cold feet on the T45 build soooo... Plan B.

37244


37245


2004 TR3650

60k on it, I'll be opening it up to check it out but for the price I couldn't pass it up. Luckly all the conversion stuff I gathered for the T45 will work on this too. I just need a speedcal now.
 
The T45 got a bit pricey once I checked my cart at T45source :tongue: I didn't intend for it to become a full blown buildup when I got it, just a mild refresh but then I wanted carbon fiber blockers instead of paper. Then I planned to just upgrade the 3-4 shift fork to billet but then I noticed the pad mounts of the 1-2 fork were slightly damaged(the nylon pads broke off and it ground into the syncro slider), so may as well get that too. Then those would be silly to get without the billet shift keys and brass pads... Well I buy all that and I don't replace all the bearings, races and snaprings? Well all of a sudden that's a full blown rebuild I neither want to do, have the time to do or willing to spend the money to do(if it were a T56, then yes).
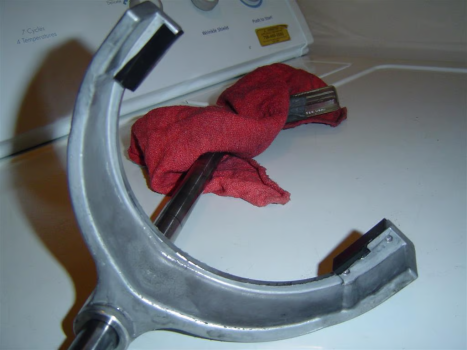
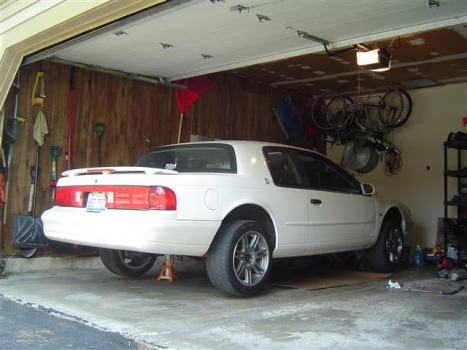
The TR3650 is pretty stout in the areas the T45 is weak, has low miles, has the .62 overdrive and since it's an 04 I can still use an external slave and a regular driveshaft. Finding this one just timed out right.
 
Alrighty, UPS man dropped off a socket I needed to pull the trans apart, half hour later...

37254


Despite the trans having low miles the seller did disclose he had trouble shifting into second unless he babied it(which was the reason he pulled it), so I rolled the dice and had to take a look inside to assess the damage...

37255


Assessment complete :(
 
I've been a bit of a hermit for the winter BUT the TR3650 swap is back in gear! (no pun intended)

I pretty much decided to bite the bullet and replace both second gear and the slider, the former showed up today from Pro-Force Performance.

37257


I was on the fence about the necessity of replacing it but seeing the dogs side by side says it all :eek:

Also got the bronze 1-4 fork pads and upgraded roll pins from them.

37258


For fun, here's my total cost for the trans alone:

-I paid $50 for the T45 from rmfk13,
-I paid $125 for a bellhousing and misc parts to fix it's problems
-Then decided not to use that trans after coming across the TR3650
-Paid $100 for the TR3650
-Paid the $200 speeding ticket I got getting the TR3650 ?
-Sold the now perfectly good T45 for $350
-Paid $150 for second gear
-Paid $50 for the fork pads
-Paid $130 for the 1-2 slider assembly
-Got the used but good syncro cones free (thanks again 97Tturd!)

I'm no mathematician but my net cost is $455 for a now pretty fresh updated TR3650 with bronze fork pads. Quite an adventure but I think I came out ahead:D I wouldn't recommend my approach for future budget 5-speed swappers though lol

Other stuff I've done with it, finished my slave bracket

37259


I also found that if you remove the snap ring and flip the bracket you can clock the fitting so it's vertical rather than horizontal, which I'm much more comfortable with when it comes to exhaust proximity.

Also halfway done with the shifter relocation setup.

37260


I'll finish the other half once I get the trans in. I'm using the SC 5 speed top so I won't be entirely certain where to center the stock shifter until it's in the car.

More to come!
 
The only downside to mounting it that way is the bleeder is no longer on top, which may create issues with conventional bleeding. One nice thing about the external setup though is simply pushing the piston in by hand a few times forces all the air up through the line and out the reservoir so it shouldn't be an issue. Also on the shifter extension, you may want to have the ends extend past the shifter and weld both bars together. I found with a setup like that, it loosened over time. Of course my shifting has been described as trying to pull the engine through the firewall every time I grab 2nd gear!
Yeah I've considered the bleeder port location but I could always clock it one way for bleeding and the other way later as well, I hadn't thought of bleeding it by hand though that's much easier ?

Are you referring to the bars linking the shifter arms together or the L brackets holding the bases together?

The shifter links will be connected on both ends and adjustable.

37261


Updated thread title! :)

Joe
Just my little abuse of power, could be worse ?
 
Old

37262


New

37263


I didn't think they were THAT worn lol
 
Good timing, got the hardware this week and worked on it today:

37264


37265


37266


I ended deviating from my drawing a little bit. First I didn't bother with the "outer" clamp bolts/locknuts since I think they'd be fairly unnecessary given the .25" plate steel linkbars, plus the adjustability of the inners will still allow me to tighten them in the unlikely event they bend anyway. Second I also used flanged bronze bushings instead of a bushing + washer, which amounts to the exact same thing, and it didn't occur to me that these existed ?
 
Today's little project

Problem with the external slave setup is it leaves a big ass hole on the bottom of the bellhousing that is otherwise covered on cable setups this transmission is designed for, so I decided to alleviate that with a modified stock cover. Some may see this as unnecessary but I wanted to eliminate the possibility of debris entering the bellhousing.

To illustrate what I did and why, this is how the cover is removed...


It slides forward and is held on under tabs at the front and is fastened to the back with a single bolt to hold it in place. Obviously the back is now where my slave cylinder mount resides, so no way can I use the stock cover as intended so this is what I came up with...

37267


First thing I had to do was redo the slave and bracket mounting by using countersunk SS bolts, which allowed me a ton more clearance for the cover. I also bent a chunk of sheet metal and sandwiched that between the bellhousing and retaining nut I'm also using as one of the mounting points for the slave bracket(it looks rusty but it's just on the surface. It wipes away with WD40), this will hold the cover in place now that it obviously can't mount to the back.


37268


Next I cut about a half inch off the back of the stock cover, this way I can put it in and slide it forward with the slave bracket in place. Obviously that would leave a gap so I also made a filler section out of sheet aluminum to fill it.

Basically the process is this:

1) Slide cover forward.

37269


2) Slip the filler section over the cover

37270


3) Fasten them down with screws

37271


37272
 
Got the trans put back together finally, I had to order new fork pads for 5th and Reverse before I could RTV the case assemblies and the crazy weather this week seemed to delay the delivery a few days but with them showing up in the mail this afternoon I got right on it :)

Here's another good before/after of second gear for you carnage obsessed techies ?

Then
37273


Now
37274


Also the upgraded roll pins:
37275
 
Here's the bracket. The squiggly section at the right would probably need to be contoured differently for the T45 as I mentioned, otherwise the holes are all the correct alignment.

36966


As for the threaded rod I'm using the outermost hole where the cable goes from the factory. I'm using a nut with a rounded end to act as a ball style joint.

36967
 
Living up to the thread title:

I'll finally have real Mercury keys, and not just ACE copies. Big day! :D

37277


Oh and I also did all of this...


37278


Point of no return...

37279


37280


Halfway point...

37281


And I found another awesome benefit to an external slave...

37282


Completely bled on a bench! (and yes I made sure I could fish it through the engine compartment assembled beforehand lol)
 
Enough hijacking my thread you whores lol

I wasn't quite as productive as I planned to be this weekend, I got it apart a whole lot faster than it is going together. Lots of BS not quite fit moments, improvisation and planning ahead for things I hadn't entirely anticipated ate up a lot of time. That wood jig under the TR3650 in the pic below? Yeah I ran in circles trying to balance the trans on the jack yesterday before I decided to make that(which as ugly as it is it worked fantastically and will remain in my arsenal of homemade tools). Also to my irritation I discovered this trans has the mount about 1" further back than the 4R70w, just enough to put the mount out of the slot on the crossmember, resulting in me spending precious minutes feebly slotting and checking the mount and bracket before finally deciding to drill new mounting holes further back and using nuts for the bolts.

Should have just bought a damn Mustang lol

Anyway enough of my rambling, I'm sure the 3 people following are eager for pics :D

37283


Freshly cut flywheel, pilot bearing and 5 speed specific bolts that didn't come with thread locker(**** you Ford) installed.

37284


New Valeo clutch disc, precariously held in place by my thumb.

37285


Not so new but still quite good pressure plate completing the assembly. Also sporting new dowels and bolts with thread locker(thank you Ford)

37286


The most important piece of the puzzle

37287


Installed. You can see the relocated mount and the ugly rusty washers, nuts and bolts holding it in place, which are temporary since I really didn't feel like riding my bike to Ace to get two nuts for the stock bolts.

Also learned it's not quite as easy as an auto to slip in place, had to balance a jack under the oil pan with the one under the trans and rotate the crank little fractions at a time to get the input shaft splines to line up.

37288


This was the rewarding part though, I absolutely NAILED the hole size. I thought I'd be dremeling a bit more towards the front but nope:)

More to come:)
 
More disjointed progress...

Last I updated I got the trans in, put the starter back, ect. So first thing yesterday I put fluid in it through the shifter... slowly....

37289


While that was filling up and now knew where the shifter lies I was able to finally finish the other end of the shifter linkage, clean up the brackets and modify the stock Mustang base, and this is the result.

37290


Something that somehow hadn't occurred to me was the fact that the Tri-Ax comes apart, allowing me to pull the bracketry straight off without having to realign it all

37291


37292


Now that that's done I was able to put the second quart in...slowly...


While that quart was filling up I went to installing the slave, turns out I guessed pretty good on the allthread length, leaving JUST enough room for the end nuts ( which I use to hold it stationary for adjustment of the inside ones).

37293


You can see the line routing I used as well, here's a view from the top

37294


Now that that's none with I was ready to put in the 3rd and .17 quart...


Which went... quickly, since I learned just now to punch a hole in the bottom of the container!


Now in progress is the MN12/SN95 shifter boot hybrid, which I'm figuring out as I go. Here's some teaser pics:

37295


37296


37297
 
Sorry Rayo, Mike got it. It's quite a bit bigger than a serpentine belt and I wanted it to be stiff, so literally the first piece of thick plastic I found was that old pedal and started trimming and drilling.

I'll still be using 1330 U joints, I'm actually converting flanges in order to use the P71 Driveshaft, which is about 1" shorter than ideal, so rather than getting a custom DS or going back to a crappy steel shaft from a civillian Crown Vic I'll be using this + an Fabtech aluminum spacer made for truck lift kits. Steeda Makes one for the smaller flange but it's not as thick as I'd like. And yeah I was pretty hesitant about the preload going out of whack, hopefully I counted right :tongue:.

Bolt pattern is much wider, yes. Which as an added benefit I can R&R the bolts with regular sockets.
 
Got a few things finalized and for all intents and purposes it's done :)

Starting where I left off

CVPI driveshaft vs. 93 Mark VIII(anyone looking for one? lol)

37305


Aux shifter assembly installed.

37306


Now as promised earlier is the Boot assembly. I opted to use the factory SC boot as well as 2(yes TWO) SN95 Mustang boots.

I basically used the SC one for a perimeter seal and the rubber portion of a Mustang boot for the main boot portion. This was mostly done since the original rubber was torn and the Mustang ones are ubiquitous, but it also gives me more rubber at the front to seal to the forward boot assembly...

As for that forward boot assembly I'm using the rubber AND most of the frame, which I contoured to match the MN12s tunnel indents for a full seal. The boot itself is nearly unmodified other than the hole I made for the harness passthrough. The SC boot effectively sits on top of the ends of it when assembled.

37307


37308


37309


37310


37311
 
Next was the wiring/Speedcal install. Naturally I can't follow directions when it comes to wiring so I did it MY way :D

37299


37300


Next is the harness. I didn't bother wiring the rear O2 sensors, which was not really out of laziness or the fact that they're shut off in the tune, I simply don't have any matching wire color left to salvage, and yes I'm THAT picky lol

37301


37302


For sharp eyed viewers paying attention you'll notice the connectors at the top left in the first pic match the connectors I used on the speedcal, yep that's how I did it ;) Here's why...

37303


37304


I can now mount it in the passenger footwell so I can easily recalibrate it for tire height changes or gear changes(I'm not leaving it dangling, I'll be using double stick tape to mount it to the bottom of the heater box).
 
There's just something about modding our cars..That if you can make it look like it belongs there..It looks that much better..

Now I just have to see the center console top mounted with the SC boot..Then I'll start awarding points.. ?


or deducting.. :D


Rayo..

Deduct away:D

37312


37313


37314


I was worried a T-handle would be too rednecky but I'm old school at heart and always loved the look and feel of them (plus Cougars did briefly sport them as a factory option :D) and wanted to see if I neatly could integrate one into the MN12 interior, which I think it does surprisingly well since the tilt required for a comfortable grip is perfectly parallel to the driver oriented radio bezel. It was between this and the white ball, which I might get anyway just to switch between.
 
So for those following the chatbox conversations it seems like the 1-2 shift fork might be bent, the one part I opted not to replace ?

It just doesn't want to stay in second gear and ONLY second gear, I pretty much have to hold it in place in order for it not jump out, otherwise it goes into and out of gear perfectly though mind you(as it should, the gear, slider and cone are brand new). first, third, fourth fifth and reverse all are engage and hold perfectly so it doesn't seem like it could be a problem with the custom linkage or internal detents(since second is shared with first). Upon reflection through the fact that second gear everything was toast when I got this trans it's not surprising the fork probably got bent in the process. The teardown pics are starting to reenforce it for me as well, if you look closely the slider seems to sit noticeably closer to first in neutral than second, you can actually see the very edge of the hub on the second side as well, so **** me. It's so subtle I never would have thought it was a problem, it's not like it sits crooked in the hub so it seemed all good.

37315


Kinda blows but I probably should have seen it coming, that extra 1/16" it seems to be off by definitely would cause these symptoms I think.

On the plus side this makes me want to get the DOHC swap fast tracked to give a more enticing reason to pull the trans again.:D
 
Man you're good at making a man paranoid :tongue: Yes, I'll now be checking the rail when I crack it open too. I'm fairly certain it's the fork alone though, Ford had several TSBs on it and never seemed to fully cure it until the 05-09 models, which use a massive 1-2 fork. Ford also made a TSB "gorilla" fork for the 01-04 transmissions that matches the 05+ spec, so that's the one I'm seeking out. (I'd still like to know why the 05-09 fork supposedly doesn't work in the 01-04 trans).


As a status update, now that I've finally got the hang of driving it with a certain level of confidence, it's damn fun. Already planning upgrades for it!

1. Clutch. The SC/S10 Master/slave combo seems to give a lot of leverage because this OEM clutch is LIGHT, pretty much takes the same amount of pressure to depress it as it does the accelerator. Leaves a lot of room for an upgrade before the pedal would become unbearable for stop and go I think

2. Shifter. I installed a Tri-Ax, it shifts great, it's not as notchy as I expected, my linkage works fantastically, and I haven't missed a gear yet... But, as most reviews note for it, it does let in some audible transmission noise due to it's completely non-insulated mechanical design. You can't really hear it with the windows down but when they're up you can hear it, and it's not a cool whine noise like a Muncie M22 as I hoped for lol, it's just a faint a vacuum leak like hiss in most gears. It's not irritating enough for me to put a stock shifter on to silent it but the MGW shifter, which was designed to shift good AND be silent, is now in my plans.

Tricky part is that I'm going to have to figure out how to make the linkage work since the MGW doesn't take standard sticks, so I'll either have to modify it(not preferred, unless I find one cheap) or make some kind of adapter to slip over with a mounting point at the end so my linkage's necessary pivots can work.
 
Wow thanks! I can't even read through all this crap :tongue:


So I ordered a new clutch already, got a NIB Exedy Stage 1 for a steal. The squealing throwout bearing is currently attracting packs of dogs so in addition to replacing the shift fork I'm ramping up on upgrades. :)
 
Junkyard today, I originally intended to recover my own but this just happened to be calling my name while seeking out various black interior bits, just couldn't leave it. Best part? The windshield was removed from the car I found it in, so no removing seats and doing gymnastics with it to get it out through the door opening:D

I'd like to see a leather or vinyl liner I just suspect it would be a nightmare to wrap with the soft factory backer. I just envision the stiff Leather will turn the backer into a pretzel when you glue it

Getting an aftermarket sunroof installed?

I've had my aftermarket sunroof installed for quite a few years now with no complaints..

Mine is just a pop-up though, and can be easily removed if I want to drive with the top down..lol


Rayo..
God no lol. My car has a factory sunroof and this is the factory black headliner for it. This is a big piece of the black interior conversion puzzle :)
 
It all came back to me, front comes out first, make sure to open the window(did that after I snapped the pic) and gently pull it between the door opening and window frame. Passenger seat definitely needs to come out!

37317


37318


I was responding to your message there, Matt grins

Unless Grog's using your logon ...

RwP
And I was responding to grog's:tongue:
 
And it's back together :D

37319


Probably pull the moonroof on the weekend and swap shades. Anyone know what kind of tape is used on the sunroof track to unibody? It looks like some kind of clear tape with thin layer of foam :zshrug:
 
Fruits of today's unexpectedly long labor

37320


Anyone have a pair of black Mark VIII moonroof double visors?

37321


The second pic may not seem like anything special but I haven't had a working wind deflector installed in my car since 2006 when I accidentally ripped it off the brackets. Got the ones out of the car I got the headliner out of while I was there.
 
Your Black interior swap is coming along nicely..Did you say what you were going to do about the dash color?

I think I seen a set of them on Ebay while I was looking for something else yesterday..If I find them I'll shoot you a link..

Does that look anything like what is wrapped around the vents?..I don't know what Ford used, but it looks like regular old foam weather stripping..
e72ad998-94e7-4508-a1f0-a36fcdff9401_4.jpg


Thanks for updating the How To Install Moonroof Seal thread..All the information should be there now..


Rayo..
Dash, door panels, sail panels, A pillars and knee panel and glove box door are getting done in SEM landau black

I found them already, two pairs reasonably priced pairs of black double visors on ebay but neither are sunroof versions(I nearly bought one of them before noticing)


The foam is way thinner and more porous than the vent foam. Like I said, it's only probably only 1/8" thick new, compressed from 21 years it's about half that.
 

Similar threads

Back
Top